 photoartflight
Image Stacking For Detail With Soft Backgrounds
Posted on April 16, 2020

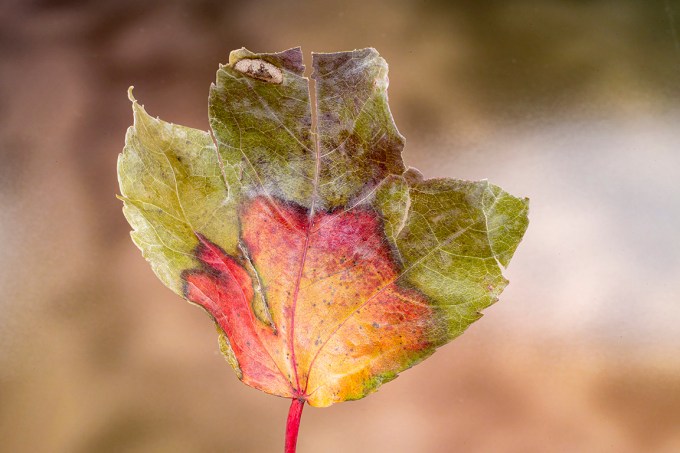
Quite often I use Image Stacking techniques for my macro images. This works best if you are using a longer macro lens for shallower depth of field & softer cleaner backgrounds. I shot with the lens wide open and take images starting from the closest area I want in focus & ending where I want the background to go softer. The image I chose for this blog is one I photographed years ago. It was photographed using a tripod with a Sigma 150mm Macro lens & 1.4x Canon Teleconverter. I also went a little overboard on layers, but because I was using a 150mm lens with a 1.4x Teleconverter I shot more focus points than usual. I ended up with 44 images in this stack. But shooting @ f/2.8 & adding the 1.4x teleconverter it was actually f/4 (Wide Open). I started from the bottom of the image & worked my way up to the top. You can also not use all the layers if you want to select where the softness ends or begins. Here I purposely ended where I wanted it to end. You can also use a smaller aperture / larger f/stop number to use less images for the stack but I like the smoother background.
I then load all the images into one Photoshop layered file and select all layers.
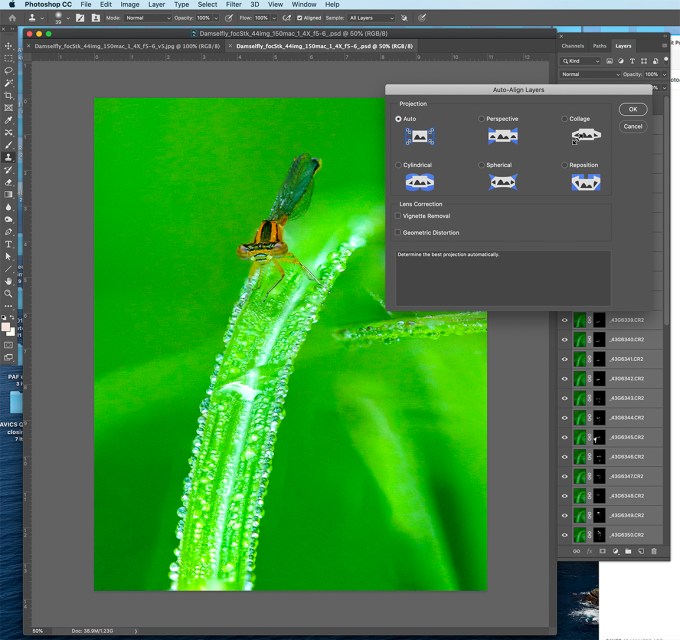
A) Under Edit – chose Auto Align Layers

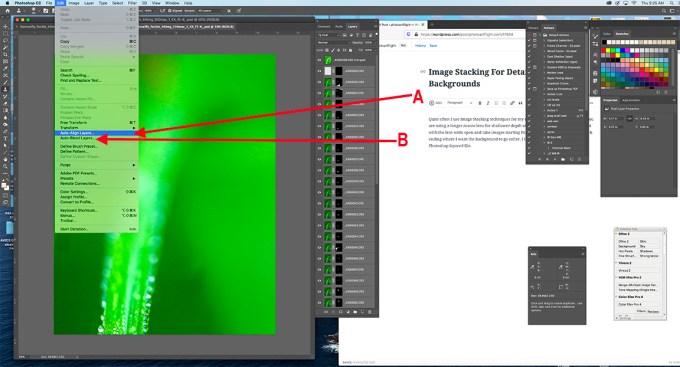
(B) then select Edit – Auto-Blend Layers – for final blending.
Below is Final Blended file on the top layer in Photoshop with all the sharpest sections of each Layer (masked) below the final layer.
I use this technique with my macro images mainly to get the greatest detail on my main subject and the softest backgrounds behind them. You can also control how much sharpness you have on your subject and where the softness starts. With practice the results get more reliable for what you are envisioning when you are photographing them. Also you can change your mind after you captured the series and have the detail or less detail where you want it while you are adjusting your files.
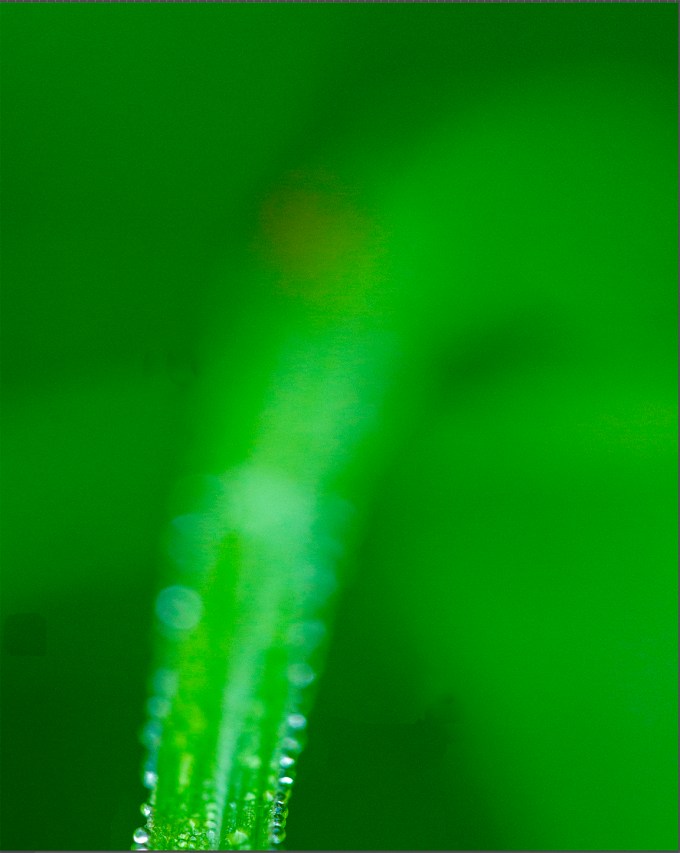
First Image in Series
Getting Close To Your Macro Subjects With Canon MP-E 65mm Macro Lens
Posted on December 4, 2019

 Over my Commercial career, I often had to get very close to some of my photo subjects. Some of the smallest were photographing a machined part on the head of a pin or extremely small products for nerve and other surgeries. So I had a wide assortment of macro lenses to use depending on the subjects, client’s needs, camera formats and magnification I needed to fulfill my client’s needs. Now that I am semi-retired I have more opportunities for my personal photography to use them for fun and to experiment. One of the most interesting is the Canon MP-E 65mm 1X – 5X macro zoom. It is an interesting lens for extreme closeup photography. Somewhat difficult to get used to but once you use it a while it is an extremely useful piece of equipment. You can also get even closer if you use extension tubes, cropped sensor camera or a teleconverter. It is a very manual lens, you focus by moving the camera & lens back & forth so a focusing rail on a tripod also comes in handy. I usually just use a tripod and get close then fine tune focus by loosening the camera and sliding it somewhat on the rail on the tripod. Minimum f/stop is f/16. But when the lens is fully racked out at 5X you use a lot of light on the sensor, I usually check the exposure on the preview after a shot.

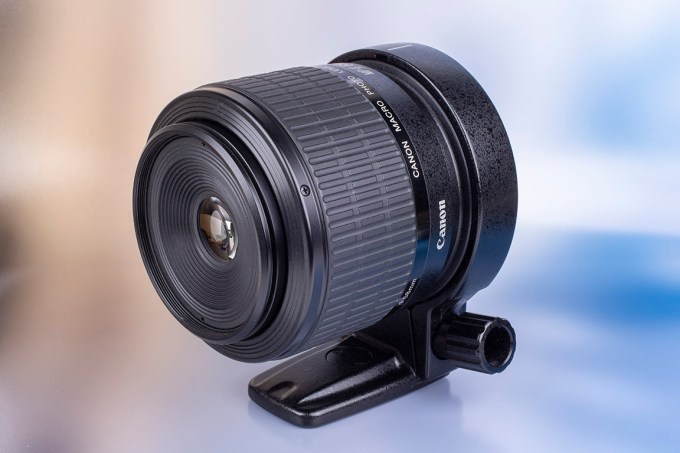
Canon MP-E 65mm Macro Lens – 1X – 5X f:2.8 to f/16 manual focus lens. (@ 1X setting, zoom)

Canon MP-E 65mm f/2.8 1-5X macro lens @ 5X setting
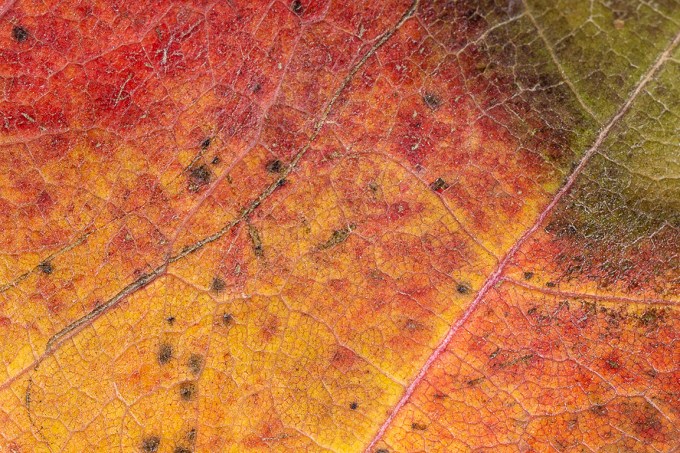
The featured image and the two below are closeups of a butterfly wing.


It is definitely a lens you have to get used to. Manual focus by moving the camera, usually using a focusing rail on a tripod or moving the camera & tripod. “Zooming” the lens changes the magnification from 1 to 5X.
But the more you zoom, the darker your image is in the viewfinder because of the loss of light racking the lens out. So when using studio strobes you have to adjust your f/ stop or increase power on the strobes. Also checking your preview helps when getting used to using this lens.
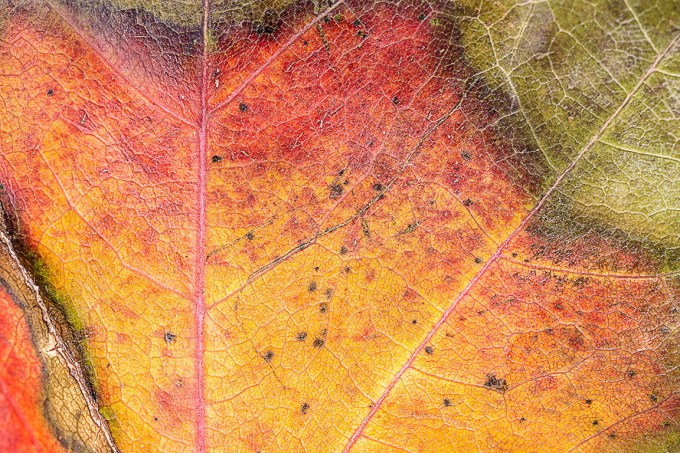
Studio Test Subject for image series – the leaf from top tip to bottom before stem is 2 inches. Image shot with 100mm macro. Could not get the whole leaf in with the MP-E 65mm. Images below are shot in the reddish- yellow section of leaf.
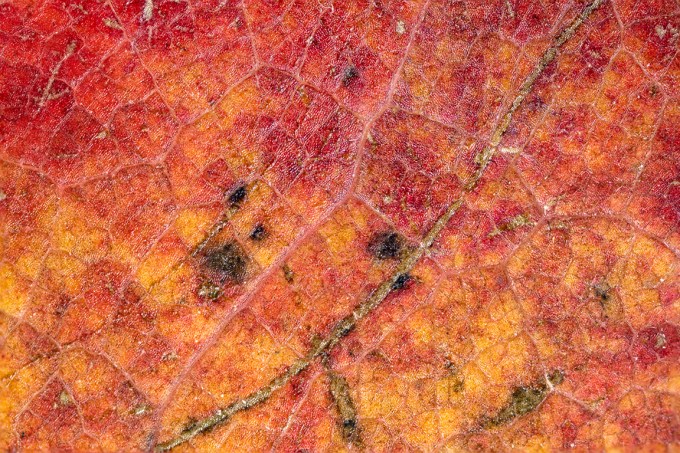
Images below are from 1X to 5X. Some are multi-image stacked images because of the very limited depth of field with this lens. Even when you think you are shooting straight in, parallel to your subject, it does not take much for an out of focus or soft area. So with this lens I always focus stack images for a series to combine in Photoshop.
Focusing with this lens can be a challenge. Even with stopping down to the minimum f/16 you usually tend to get a soft area. Using a ring light or macro flash setups also adds to the awkwardness of lighting your subjects. I usually use studio strobes instead of ring lights or other macro flash on the front of the lens which tend to get in the way. You definitely have to get used to using this lens and when you get comfortable with it you can get some amazing images and details. Once you are getting results you like, then try the challenge of using it out in the field, that is another learning experience! But once you get used to it, it is a fun piece of equipment to use and gives nice results. The only other lens sort of like this is Venus Optics Laowa 25mm f/2.8 2.5 to 5x Ultra Macro Lens at about 1/3rd the price and is available for quite a few camera brands.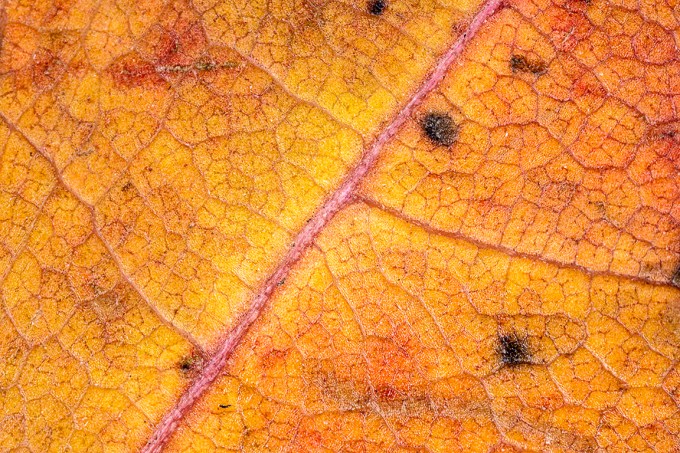


Focus Stacking For Extreme Depth Of Field
Posted on November 17, 2019

It is getting much colder outside lately and not too many interesting subjects to photograph and post. But during some of our walks I collected a few leaves to photograph in my home studio for showing Focus Stacking for sharp detail (sharp focus) across the whole subject from front to back. There are specialized programs for this but I rely on Photoshop & Bridge for most of my workflow. The newest Bridge version (2019) seems to have some problems with Focus Stacking, so I used the 2018 version of Bridge for these. I had done a Macro Workshop at my local Camera Group, so I had a few printed backgrounds to use for backgrounds for my test images here. Even at f/32 with a 100mm macro lens, I could not get my subject Oak Leaf all in focus in one shot. I also did not want to use a 50mm macro because it would distort the shape of the leaf because of the shorter focal length. I purposely chose a large long 11 inch leaf for this to demonstrate the technique. Using Studio Flash for my tests allowed me to select f/stops that I wanted to use for my test images. The featured image I started with is 15 images @ f/8. Shooting a series of focused areas from the tip of the stem to the top tip. Even at f/8, 15 images was more than I needed.

Single Shot Image @ f/32 – Stem is soft

Start of a Series of 8 images @ f/8
The above is the start of an 8 image series shot @ f/8. Turned down power on the studio flash for shooting @ f/8

Here is a series of 15 images shot, but only selected every other one for a 8 shot series (shot f/8) for this grouping.
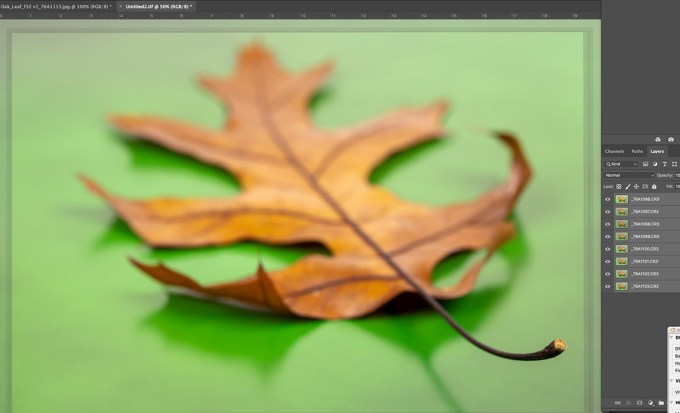
The 8 selected images from above series, showing image alignment in a layered Photoshop file before blending. You can see “edge” banding on the edges from the alignment process of image shift from different focus spots on each of the different images. (In Photoshop – Edit -Auto Align). Then once the “layers” are aligned, Go to Edit, Blend to merge the images into a final image. Once Blended the gradation banding Disappears and for the final image you can “Flatten” all the layers into 1 layer.

Final 8 Image Blend – leaf sharp from top to stem. Leaf Images shot @ f/8
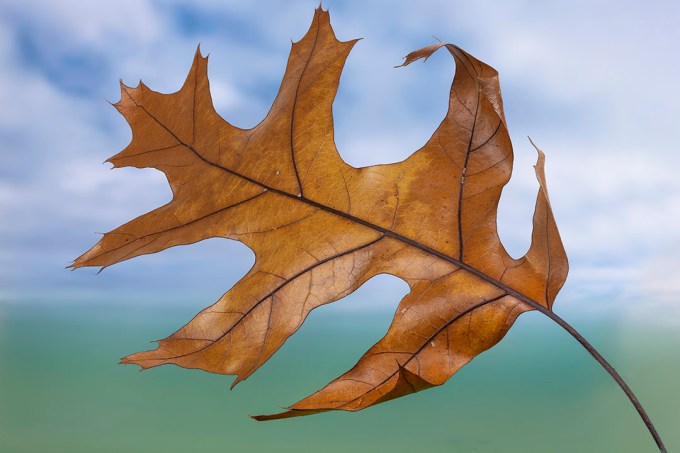
Oak Leaf 8 Image Stack @ f8

Oak Leaf 10 img Stack @ f8 – On Green Background

Oak Leaf 3 Image Stack @ f/32 – the smaller the f/stop you use the fewer focus points you need.
It takes some practice to get used to what f/stop to use and how many focus points to have along your stack. The f/stop also varies on how much light you have. Using studio flash you have more control of your power settings to make choices, but out in the field you have to work with the light you have and your chosen ISO. Once you get used to doing them you are more confident in the final image. With practice you can also get good results when just hand holding the camera for image stacking, not requiring a tripod. In future posts I will work on showing making Panoramas in Photoshop. Panoramas are more forgiving than Stacking when when shooting handheld.
Red-Spotted Purple Butterfly
Posted on August 31, 2019
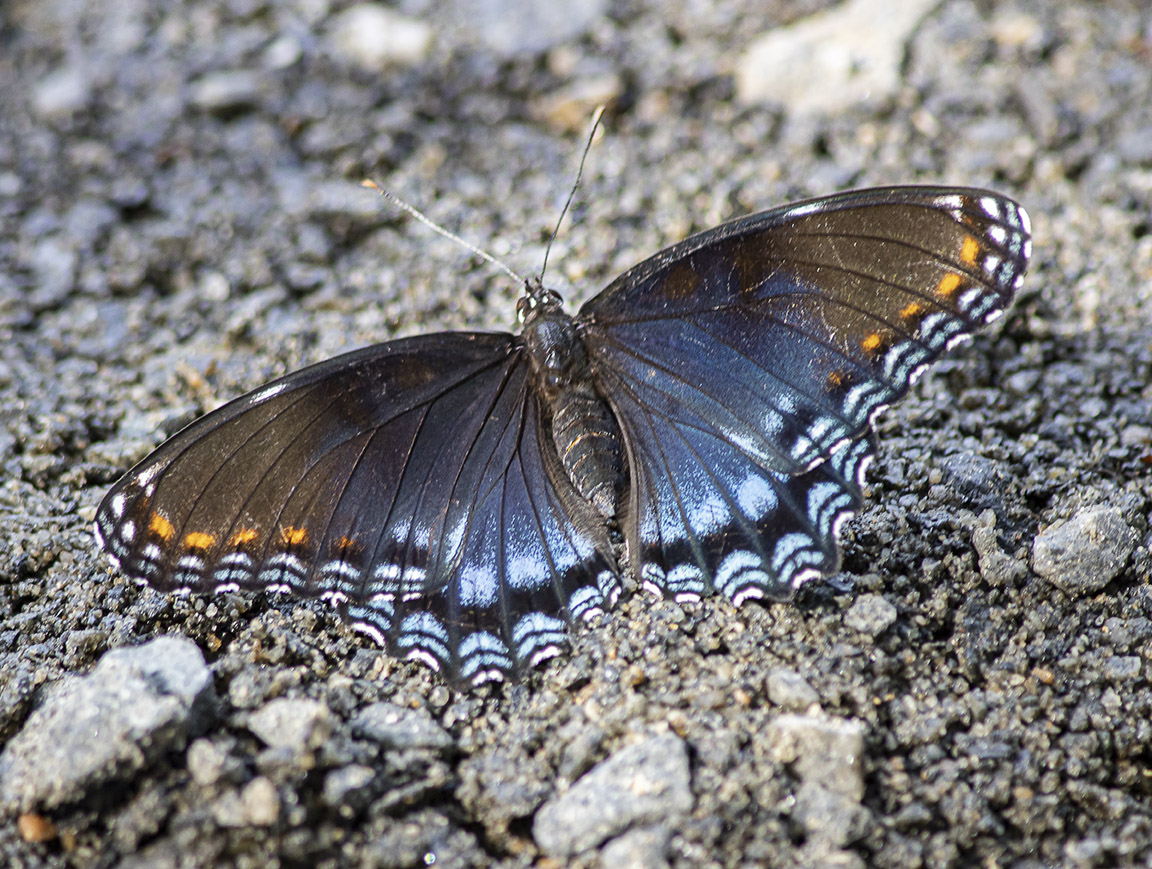
While we were looking for Dragonflies at Plainsboro Preserve I noticed this Red-Spotted Purple butterfly warming on the ground. I was using a close focusing 300mm f/4 lens with a 2X teleconverter so I could get closer images of distant insect subjects (usually Dragonflies) so I manually focused on 3 different areas to blend them into 1 sharp image in Photoshop. Using f/4 for my f/stop (with a 2X teleconverter it is actually f/8 then with the 2X teleconverter giving a 600mm focal length) and focused on middle body, then antennas and lastly rear wing edge. I used to mainly use a 1.4X teleconverter for this type of shooting but the Canon R files are extremely clean even at much higher ISO’s so the 2X gives me more working distance. Then used Photoshop to blend the sharpest areas automatically into 1 merged image. Photoshop usually does a good job on this, but here in there I might also do some manual editing to what Photoshop does. To bad it is getting late in the season for butterflies & insects. They are beginning to show signs of wear. Especially the Dragonflies!

Another on a leaf still at f/4 (actual f/8 with 2X teleconverter but it flew off before I could do my near & far focus points. That is why I sometimes shoot center, then the near & far points.
Blackwater NWR Thunderhead Cloud Panorama
Posted on November 23, 2018

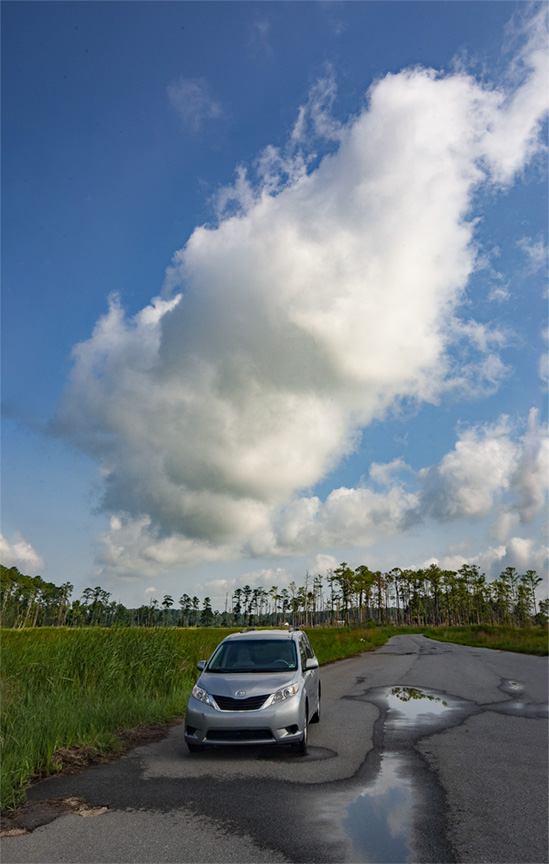
I am still going over images I shot earlier this year towards the end of Summer. Work seems to have gotten in the way of doing this sooner. This is from the Blackwater National Wildlife Refuge in Maryland, one of our favorite places to photograph. Especially for Eagles and landscapes. The clouds were amazing this day which was great for panorama landscapes. I liked the colors and brightness in the center of the Thunderhead cloud and shot the series so there was more darkness below the cloud. I thought it made the cloud stand out more and look more interesting. I was using 4 different cameras this day, depending on what I was photographing with lenses ranging for the Canon Bodies from 12-24mm, 24-105mm, 300mm & 400mm and a few macro lenses. We never know until we get there what we will find interesting to photograph. So we usually bring an assortment of lenses. Birds were scarce, so we concentrated on Dragonflies and landscapes. For this image I was using a m43 Camera with a Panasonic 14-140mm lens, equivalent to 28mm FOV on a Full-Frame Camera. I only used 2 horizontal images stacked because with a third it seemed too square to me and lost some impact. Lately I seem to be doing more panoramas or stacked images mainly for the practice & challenge of them working out. Plus it is fun (when it Works!) Also images tend to work out better when you have tried various techniques and know when to shoot more or less for certain situations. It does seem the wider you go with the lens, the harder it is to blend sometimes. Below are with the 12-24mm on a Canon Body.
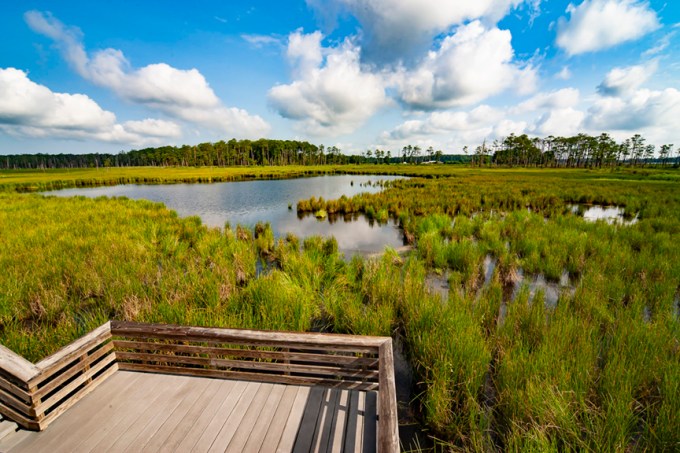
Looking out from the middle of the Lookout Platform – @12mm, 3 Vertical images panorama
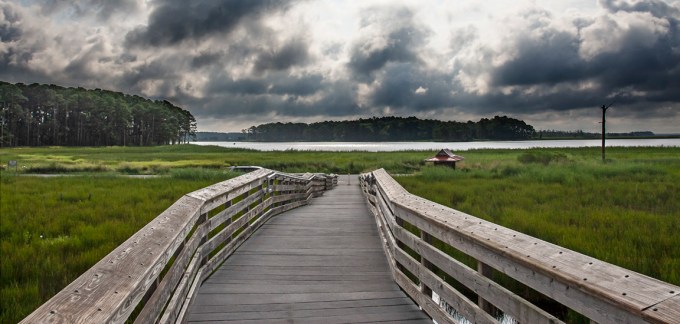
Opposite Direction on the Lookout Platform – Early am – 3 img horizontal panorama @ 12mm

4 horizontal images @ 22mm panorama – looking out from behind Information Kiosk
Looking down the Wildlife Drive by the Observation Platform – 2 img vertical panorama to include large main cloud
Blackwater NWR Sunset
Posted on August 14, 2018

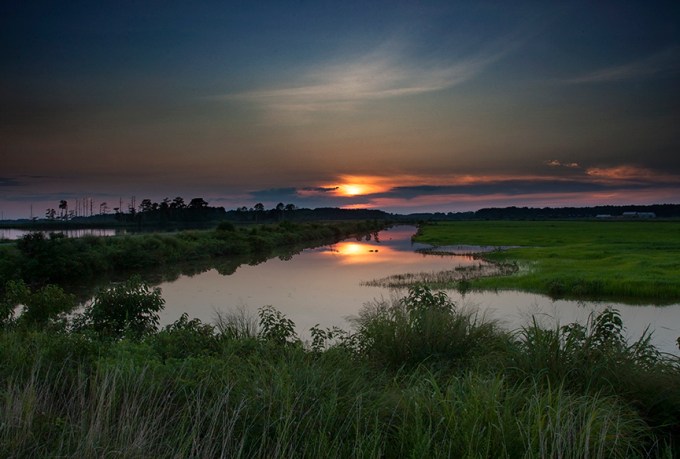
We got to where we wanted on the Wildlife Drive to photograph the setting sun, but it was not as dramatic as we had hoped for. It was still fun to photograph and got a few good images. Then we moved a little closer, around the bend towards the straightaway to the exit. These are combinations of exposure blends for darks & lights for shadow detail and bright detail along with multi-images for size. I was using 2 cameras, one with a 24-105mm, the other with a 12-24mm. The featured image is at 105mm (5 images, blended). If you see any specks in the sky, they are birds flying through. After the sun went below the horizon we then headed back to the motel to rest up for sunrise the next day.
Series of 5 images blended in Photoshop, 24mm

Three image blend @105mm

Four image blend @24mm

4 img blend @88mm

3 image blend – Sundown @24mm
Raindrop on Evergreen Branch
Posted on July 24, 2018

I went outside after a rain to look for raindrops on flowers or leaves. On the evergreen by the sidewalk, I noticed this strand of a web with a large raindrop on it. There were a few smaller drops on the left part of the web strand to the left. This was 3 images shot with a close focusing 300mm lens. I like using the 300mm more for this type of shot than using a traditional macro. It gives me more working distance and a softer background than my typical macro lenses. Even my 150mm, 180mm or 200mm macros do not give me the same “look” that I wanted.
After the featured image I shot a series of 4 horizontal images along the top of the same branch. It seemed like there were a lot of water drops on the branches. It looked like the rain ran down the lower needles and ended on the tip of the needles.

4 image horizontal panorama from same above tree
Gladiolus Image Stack & Panorama @ f/4
Posted on July 17, 2018
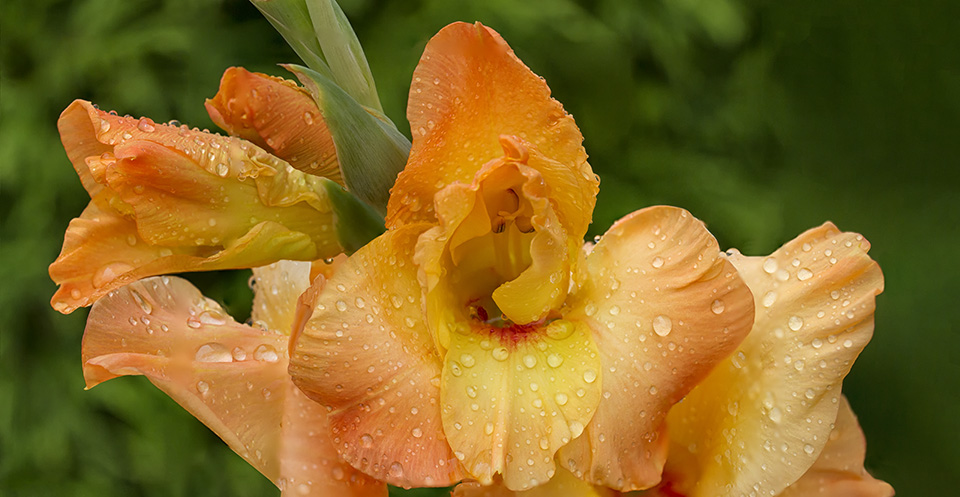
Photographing in the garden again with a 300 mm f/4 Canon close focusing Lens @ f/4. At our condo our gardens are only 3 ft deep, so if I stop down for more depth of field, the background building or shrubs are distracting. A 150mm macro at f/ 2.8 is also too distracting for me. So the 300mm f/4 seems to work best for what I like. But a 300mm that close I have to combine image stacking for more depth of field for the areas I want sharper along with a series for a panorama to get the overall area I want to capture. If I back up I get more detail in the background, so I lose some of the softness in the background. Both series handheld and assembled in Photoshop. After you do a few it gets easier to get predictable results. At least most of the time! The featured image is a series of about 12 images. I also included a Balloon Flower & Hardy Lily while I was experimenting.

Another image stack and pano series after a rain – 300mm f/4 – 10 images
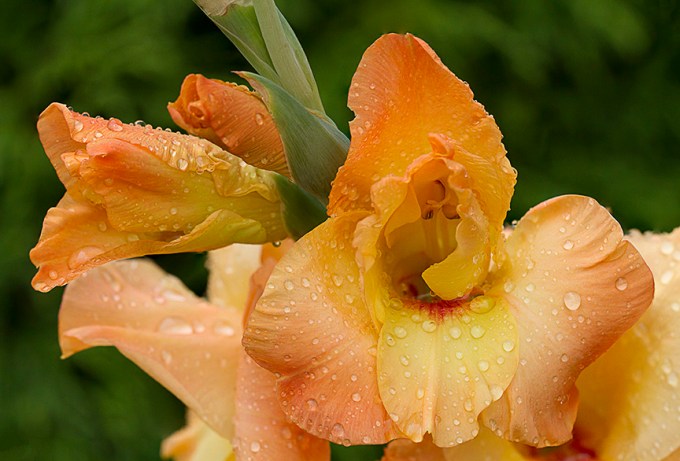
Another 10 image combo of image stacking and pano

Simple 8 Image Stack and pano – horizontal formats – Balloon Flower

Dappled light 8 Image Stack / pano – Hardy Lily
Smiling Blue Dasher Dragonfly
Posted on July 6, 2018

For some reason Blue Dasher Dragonflies seem to look like they are smiling when you see them head on, giving an impression of a Happy Dragonfly. This Blue Dasher was out in a pond at a public county park, probably 6 to 8 feet from the shoreline. The featured image is a 4 shot Image Stack, manually focused and assembled in Photoshop. I used a combination of a 400mm lens, an extension tube, then a 1.4x teleconverter to actually enlarge the image on the sensor with the extension tube added. Sometimes I add another extension tube between the teleconverter and the camera body which enlargens the image on the sensor even more. But narrows your focus range even more and you tend to need a fill flash because of loss of light reaching the sensor to get a usable exposure for a subject that is somewhat moving its head or wings or its perch is moving in a breeze. Plus the added extension tubes also takes away light reaching the sensor. Sort of like the “Old” days when you were using a 4×5 or 8×10 view camera when you had the bellows racked out and had to adjust your exposure because of light loss from the distance of the lens and the film plane. By moving teleconverter and extension tubes you can get a variety of focus windows and enlargement of your final image on the sensor.
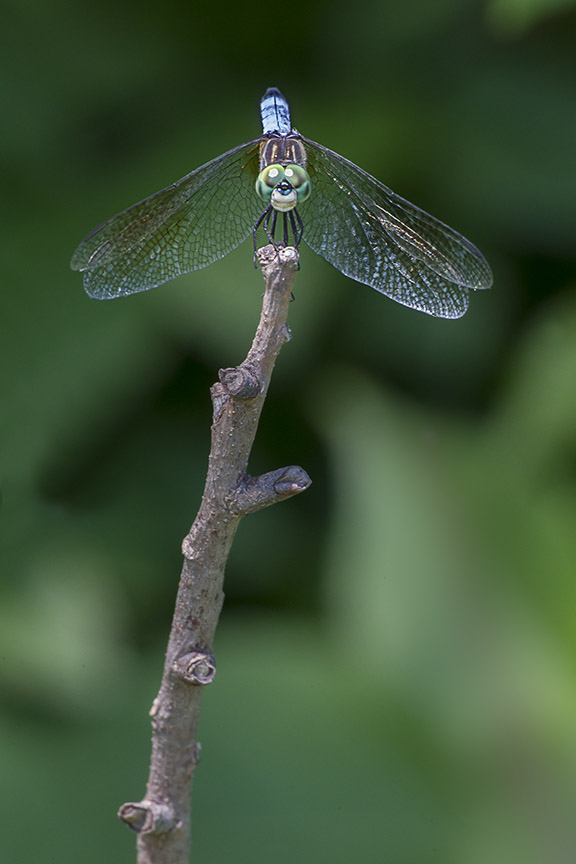
Blue Dasher 4 img Stack for Blue Dasher, then 4 image pano for the stick the Dasher was on. So 2 techniques used for final image.

Older shot showing similar Setup with one 1.4x teleconverter plus fill flash needed for using two separated extension tubes.
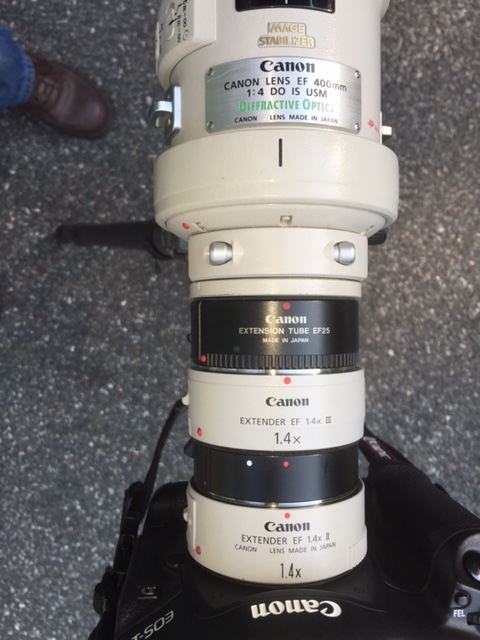
Another extreme setup with 2 extension tubes and 2 teleconverters. This really enlargens the image on the sensor but you need a fill flash or a very high ISO setting and has a very limited focus window.
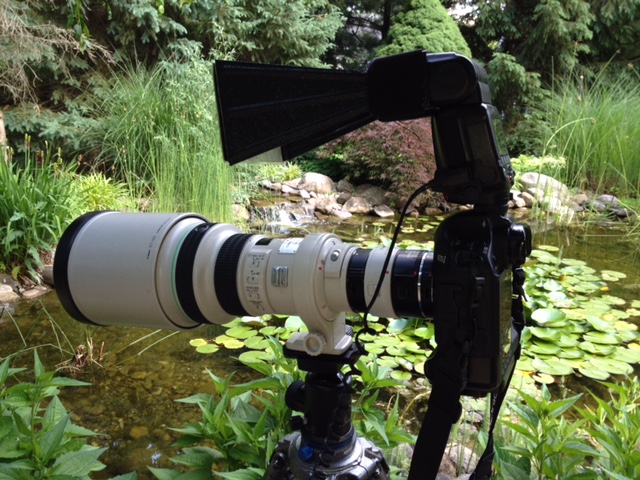
Dragonfly setup at my old pond
Meeting House At Night 4 Image Blend
Posted on May 28, 2018

My second version of the Meeting House Image. This time a 4 image blend exposed for different sections, then combined in Photoshop. All at 24mm. I also tried 12mm, but the Meeting House looked too small in the frame. First I exposed for the brightly lit building. Then an exposure for the darker trees and foreground lawn. Then 2 exposures for the few stars that were visible at this angle. I used a technique of greatly over exposing the sky on one of these, then using levels in Photoshop to pull out a few more faint stars so they stood out more. Then combining those two layers. I also made a reverse mask of the bright building so I could replace the area around the building steeple with the dark sky with stars and darker trees. Then I manually layered and masked my layers to where I liked all the elements of the image so they looked like it was somewhat balanced.
The exposure for the stars was 30 seconds, the longest time so not to show movement. But being in NJ, I had to try a few times because a jet would fly through and leave a streak of light from the lights on the wings. Which in some ways looked interesting, but not what I was after. But it is New Jersey with constant planes going overhead, so maybe I will add it later.
