 photoartflight
Lake Woodruff NWR Sunrise
Posted on February 3, 2020

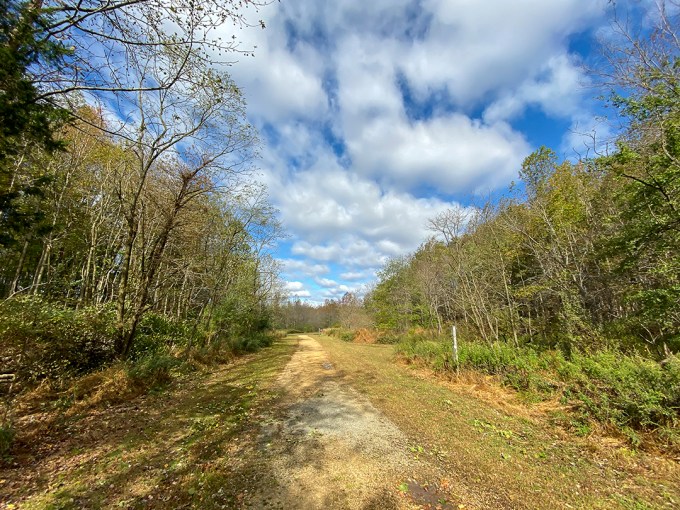
When we were at Lake Woodruff National Wildlife Refuge I mainly used my iPhone 11 Pro for landscapes. I did not want to carry 2 larger cameras, so I used long lenses on my main camera and relied on my iPhone for landscapes. I have found that when shooting a series of images to blend for panoramas, you have to overlap the images even more on the iPhone than with a regular camera. I did not want to use the panorama feature on the iPhone because you usually get an odd warped distortion or curved section in the middle of the panorama even if the subject is straight across from you. I think this is mostly because of the extremely small lenses for the sensor in the iPhone. I also used the 16:9 format in the iPhone for many of these images instead of the standard 4:3 format.
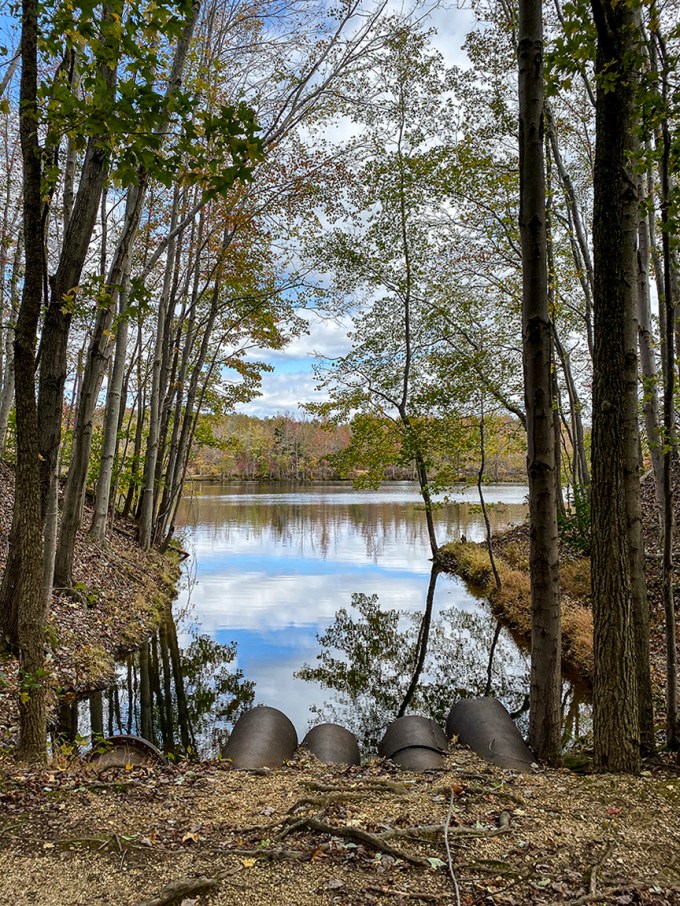
The featured image is 3 horizontal images stacked vertically. I shot these with the 1.5mm lens, 4:3 format, iPhone 11 Pro. (Full Frame Equivalent is 13mm)
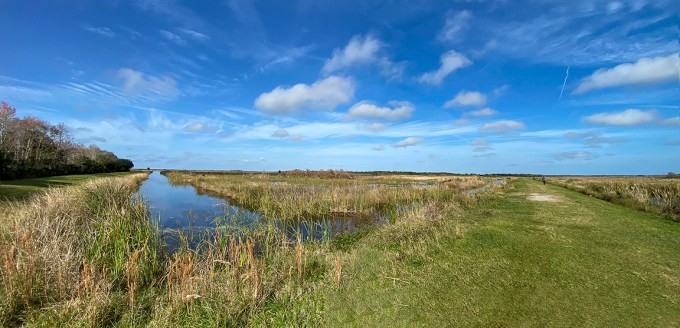
4 horizontal image Panorama, 1.5mm lens

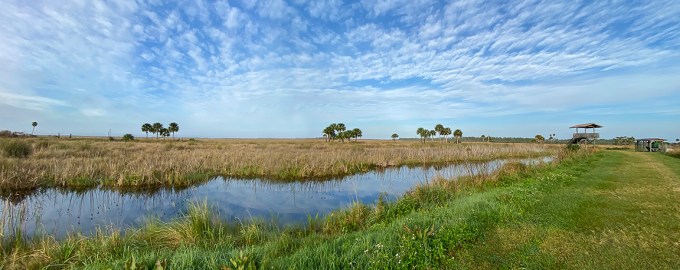
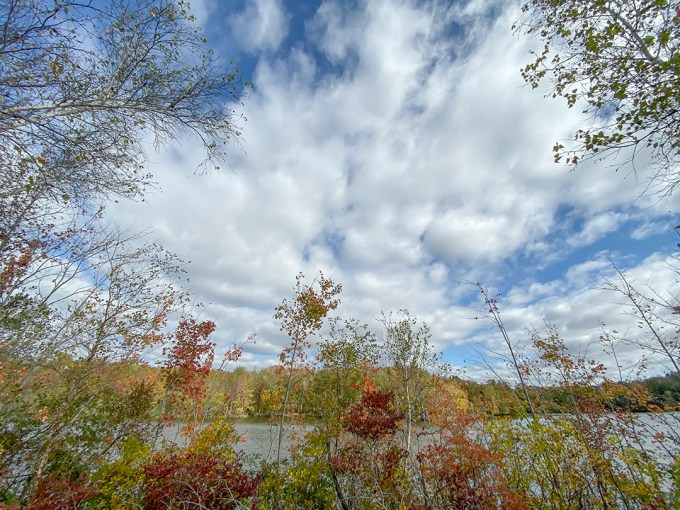
7 horizontal image Cloud Panorama, 6mm lens

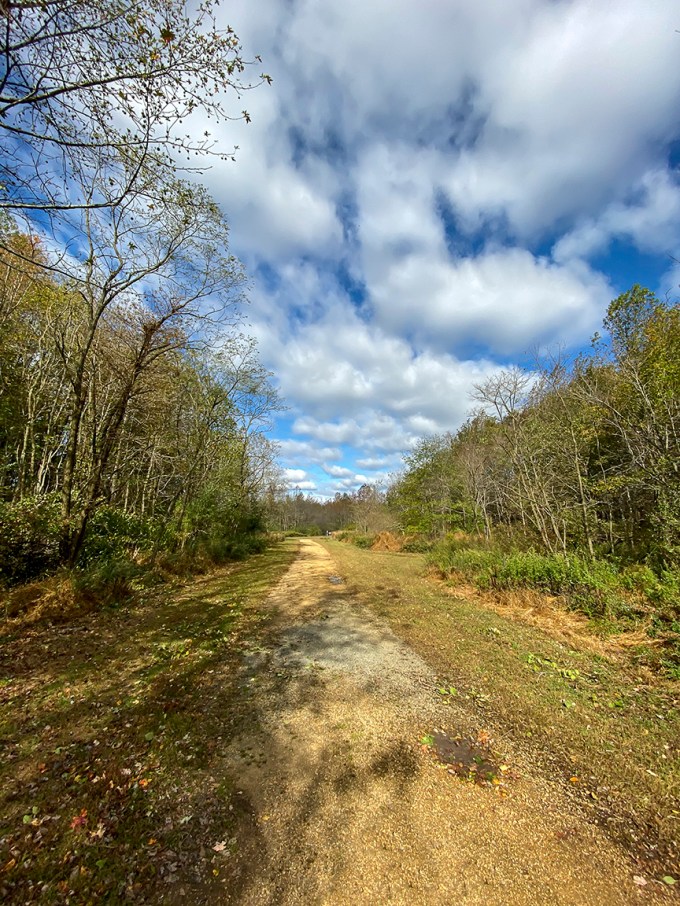
8 Image Panorama, 1.5mm lens (At corner of path where path turns 90 degrees) This is also the look you get when using the built in pano feature in the iPhone even if it is not at a corner, but is a straight horizon in front of you. It distorts the sections right in front of you because it is closer to the lens. That is why I shoot multiple images and assemble them in Photoshop.
2 Image Panorama, 1.5mm lens

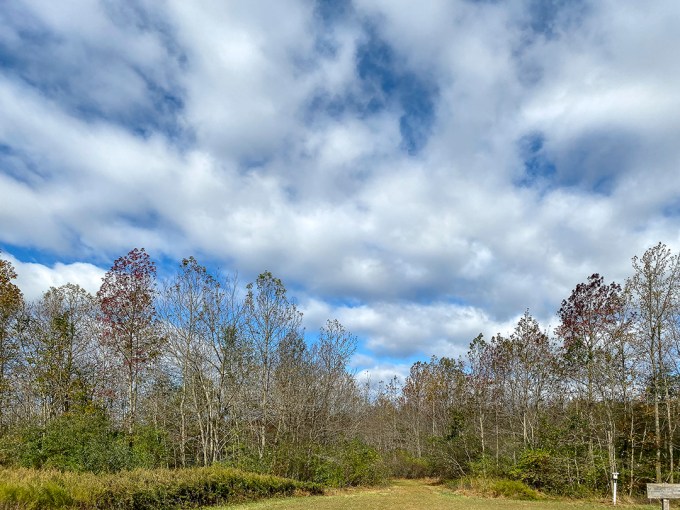
3 Image Panorama, 4.3mm lens

4 Horizontal Images, Vertical stacked Panorama, 4.3 mm lens
Hoar Frost With iPhone 11 Pro
Posted on December 9, 2019

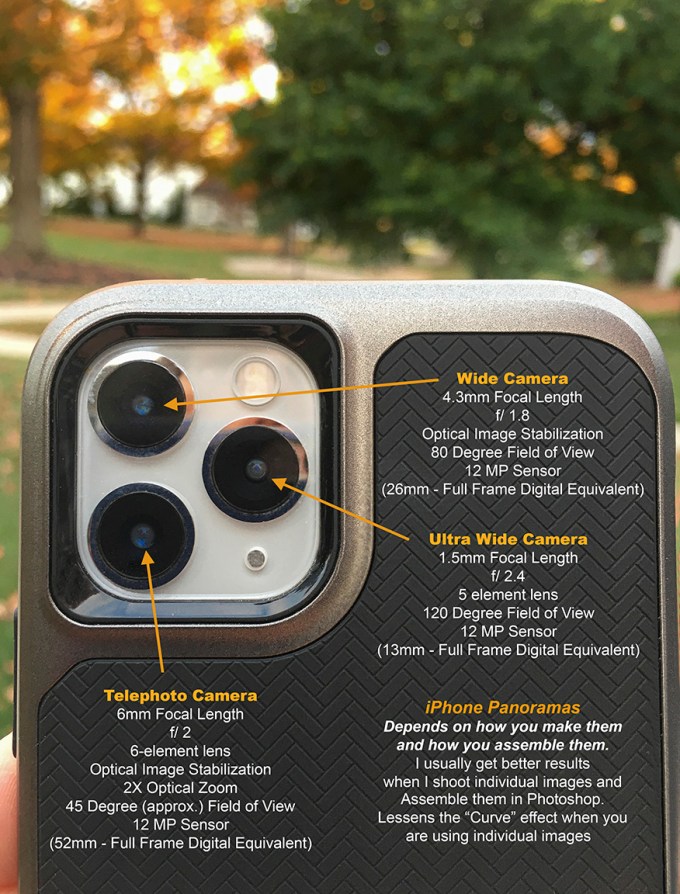
I went out in the yard early yesterday and noticed a few leaves with frost. As I looked further I saw most of the leaves in the shade and grasses were covered with heavy Hoar Frost and looked interesting. Since I am still getting used to the iPhone 11 Pro, for the multi-image pano series, I shot a few more images than usual to help prevent some distortion. But the sun was starting to melt some as it was rising, so I worked quickly to get some of the more interesting subjects. The featured image is 5 overlapping images (2 top, 2 bottom & 1 center) with the 4.3mm lens on my iPhone 11 Pro, then assembled and blended them in Photoshop. For the featured image, I overlapped more than usual since I am still getting use to the iPhone 11 Pro for panos since the lenses are so small. (Sometimes in using the iPhone pano feature, you get distortion or a “warping” look in the panorama). So most times I shoot a series of images to assemble myself in Photoshop. The lenses in the 11 Pro are 1.5mm ( 13mm, Full Frame Digital Equivalent is 13mm), 4.3mm ( 26mm equivalent, Full Frame Digital), and 6mm ( 52mm equivalent, Full Frame Digital).

2 image panorama, iPhone 11 Pro, 4.3mm lens, iPhone set to 16 x 9 format.
The following images are just single shots (except where noted) with the iPhone set to 16×9 capture format.


2 Image panorama 4.3mm lens, to show more of the leaf and surrounding area with Hoar Frost.

Hoar Frost on Leaves, 4.3 mm lens, 16×9 iPhone format, single image of above image.

Hoar Frost on Dandelion, 4.3 mm, iPhone 11 Pro, 16×9 format. (It was quite warm one day last week and a dandelion popped up.)

Hoar Frost on Leaf, 4.3mm, iPhone 11 Pro, 16×9 format
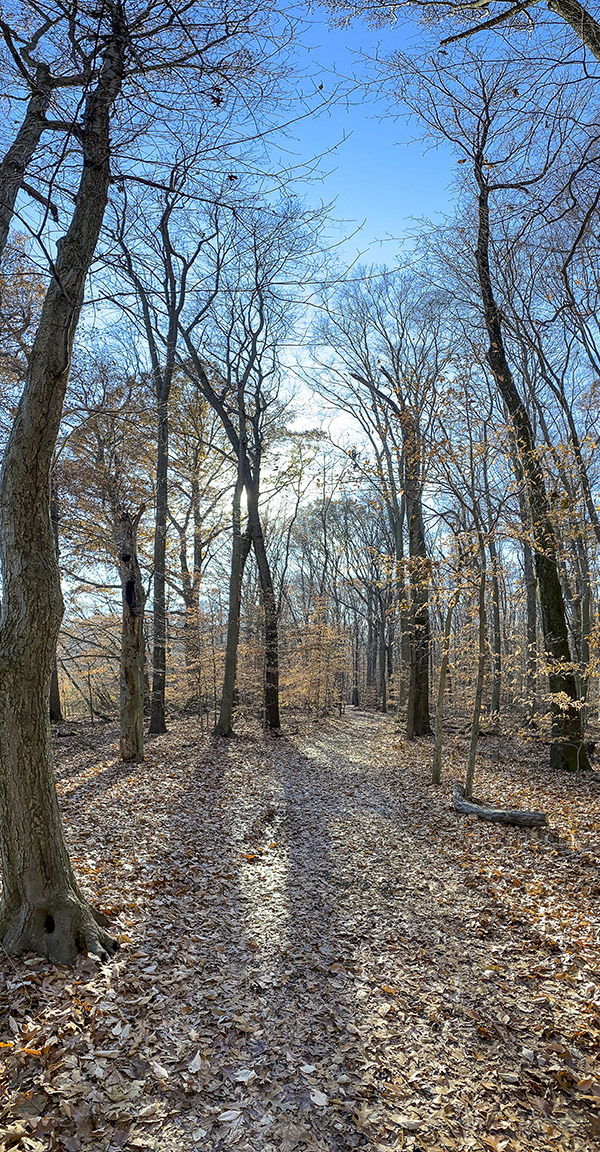
Fall Walk In The Woods
Posted on November 28, 2019
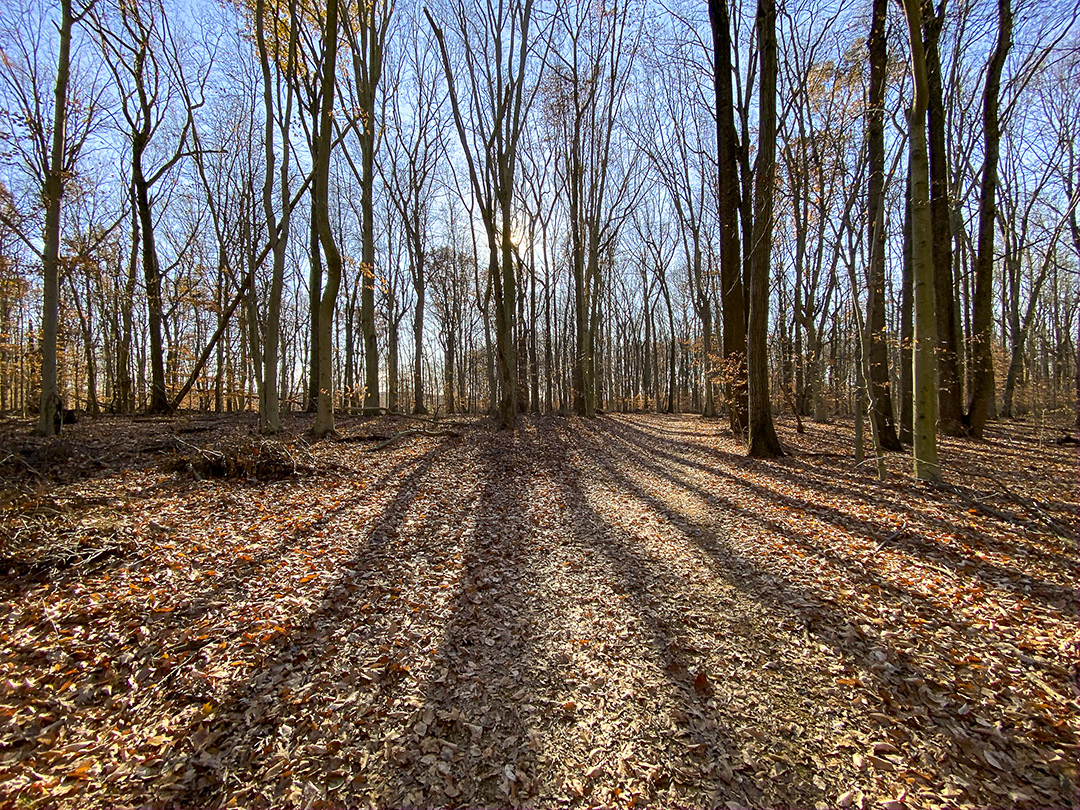
We took a walk through the woods at a local park just to get some fresh air. I only had my iPhone 11 Pro with me since I was not thinking anything would be interesting to photograph. The sun was low and most of the leaves were off the trees, but the shadows of the trees were amazing. The iPhone did a nice job photographing in a variety of lighting conditions. After getting use to the new iPhone for a while now, I tend not to use the pano mode as much, preferring to shoot multiple images to assemble my own wider or panorama views. Even with the 1.5mm lens selected (Full Frame Equivalent 13mm), I want more width without more height. On this walk I had enabled the phone to shoot HEIC Raw files instead of jpeg files. This way I supposedly had true Raw Data to work with in Adobe Bridge before opening in Photoshop instead of enabling Adobe Camera Raw to open jpegs as Raw files with settings. Also for certain scenes I like using the 16:9 capture mode setting for longer scenes without using the 4:3 usual capture. The 16:9 does not work with the 1.5mm lens.
1.5mm lens

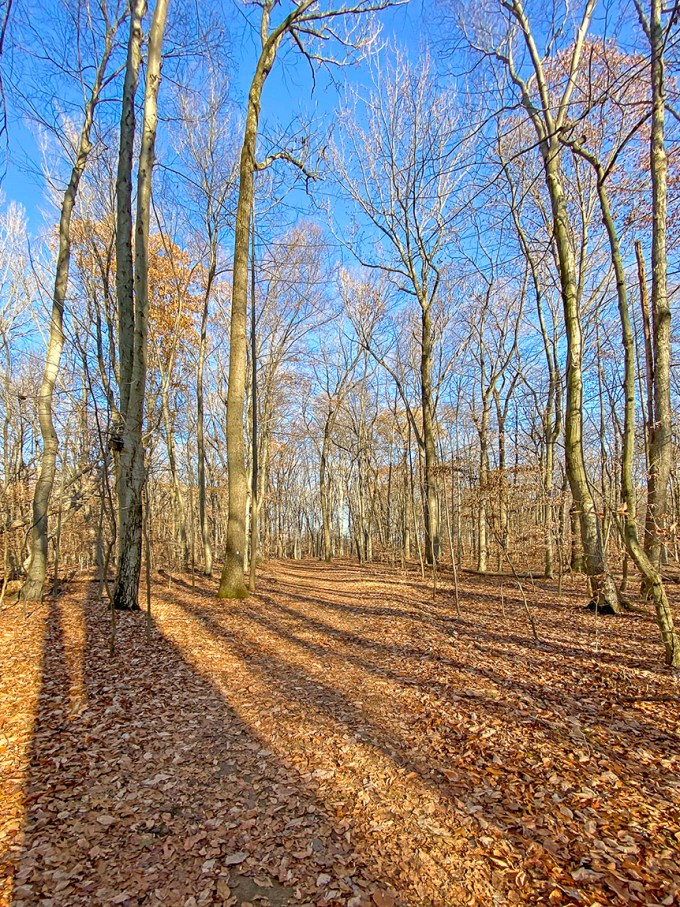
1.5mm lens
16:9 format – 4.3 lens

2 image panorama – 4.3mm lens

4.3mm lens 16:9 Format
2 image panorama – 1.5mm lens – assembled in Photoshop

2 image vertical panorama – 4.3 format

4.3mm (26mm Full Frame Equivalent) 16:9 Camera Format
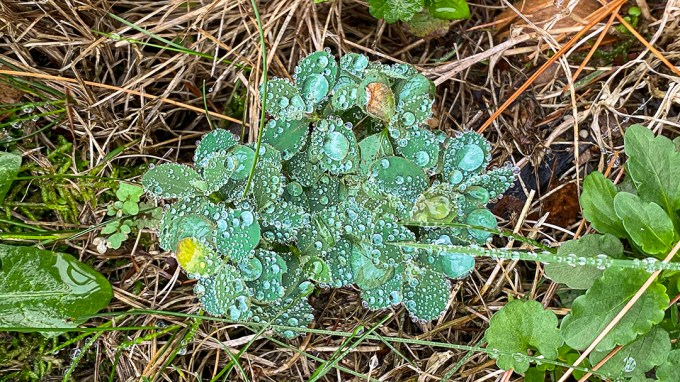
Rain Drops After The Storm
Posted on November 6, 2019

I am still testing the iPhone 11 Pro for a variety of photo subjects. These are to see how it does for closeup details. Not quite a macro camera, but very close. Plus because of the iPhone 11’s small lenses you get quite a bit of depth of field for these closeup subjects.
For these images I was using the 6mm lens (Full Frame equivalent would is 52mm)

iPhone 11 Pro – 16 x 9 Format

iPhone 11 Pro -16 x 9 format
iPhone 11 – 16 x 9 format

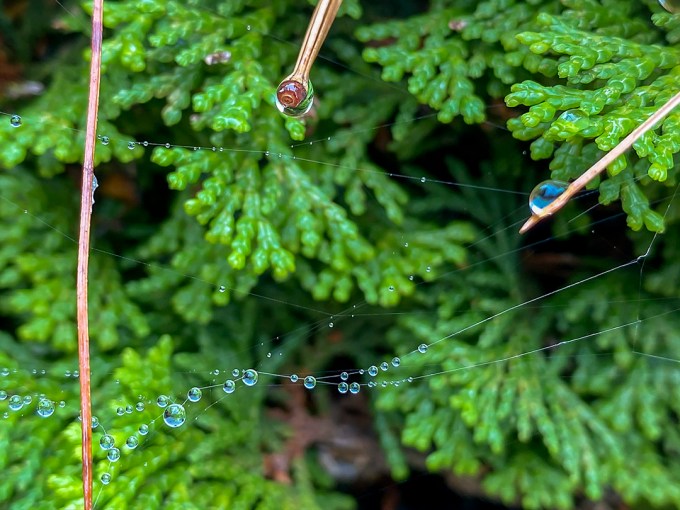
A little closer view
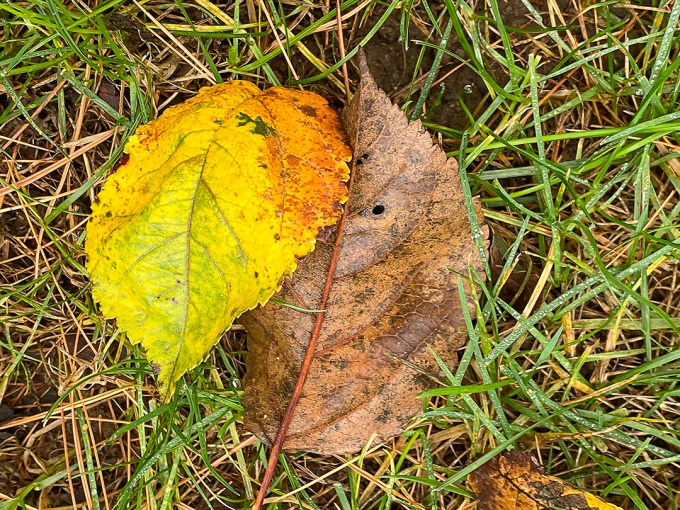
Wet Leaves In Grass
Plainsboro Preserve iPhone Landscapes
Posted on October 25, 2019

We had gone to Plainsboro Preserve for a nice Nature Walk. The clouds were beautiful there so the landscapes really stood out and were impressive. It gave me a good opportunity to try shooting landscapes in different ways with the iPhone 11 Pro and the different camera lens choices. Still getting used to the iPhone 11 Pro multiple lens choices and how well and versatile the camera in the phone is. Especially if you open the iPhone jpegs in Adobe Camera Raw as raw files giving so many options and adjustments before you actually open them. It also allows you to enlarge them with the Raw settings with better results than just uprezzing the jpegs

4.3mm iPhone 11 Pro (26mm Full Frame equivalent)
4.3mm iPhone 11 Pro (26mm Full Frame equivalent)
2 images assembled in Photoshop, 4.3mm iPhone 11 Pro ( 26mm Full Frame Camera Equivalent)
1.5mm iPhone 11 Pro (13mm Full Frame Camera Equivalent)
2 image panorama, assembled in Photoshop, iPhone 11 Pro
1.5mm, iPhone 11 Pro, 13mm Full Frame Camera Equivalent
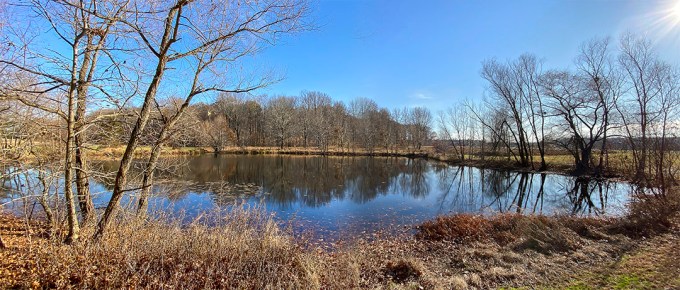
Davidsons Mill Pond Park Landscape Panoramas
Posted on October 22, 2019

I am still working on trying different techniques or ways to work with iPhone images in Photoshop. Overall it is a fun and useful addition to my equipment. Especially if I am walking around with Long telephoto lenses and still have the option for other wider views with out carrying extra lenses or cameras. Because of the very small lens focal lengths some techniques are difficult to get the results I am expecting. But it is fun to see what the iPhone can do. If you enable Photoshop to open jpegs in Camera Raw, you can uprezz your iPhone images quite successfully as you are opening them. Also you can correct/adjust the image before you open the file. Seems to work well with the Panoramas also. Do not go way overboard in size, but used moderately this seems to work quite well. The featured image was captured using the panorama feature on the iPhone 11 Pro, using the 4.3mm lens (35mm equivalent 26mm). You have to be careful using the panorama setting because quite often you get a “bowing” effect in the middle of the image. Mainly because the far left and far right are way off to the side so it in the middle it is “closer” to you so it is a little bigger, giving an slight distortion in the middle. Sometimes you can minimize this by “shooting up slightly. The Smaller Panoramas are made from 2 vertical or horizontal images, layered in Photoshop and “combined or blended” with Photoshop. The biggest problem is being careful to not exaggerate “keystoning effects” when using the extremely small focal lengths that are in the iPhone (1.5mm, 4.3mm & 6mm) shooting more straight into your views helps. 35mm – full Frame equivalent mm would be 13mm, 26mm & 52mm. Any slight up or down angles seem to distort quickly, but can be controlled a little by shooting more straight into your subject. Slight adjustments in Photoshop also helps.

Narrower Panorama of featured image, first try before the featured image.

2 horizontal iPhone images stacked for panorama
2 iPhone images for wider panorama assembled in Photoshop

2 iPhone images for taller panorama
Test Images iPhone 11 Pro
Posted on October 16, 2019
My old iPhone was not able to update to the newer software updates so I got a new iPhone 11 Pro. I was interested in seeing how the new camera would stand up for image quality. The new camera seems to work well to a point, but skies or solid color areas seem to have a slight darker center area in wide angle mode. But that is somewhat easy to change or fix in Photoshop. Some of the extreme wide angle shots also have a weird distortion, but again somewhat fixable. The file size seems to be also good for uprezzing (to a point) for larger printing. Overall I am quite happy with the performance. At the wide end the lens is only 1.5mm, but in full frame camera equivalent field of view is 13mm. So that is why you are seeing distortions that need some work in Photoshop. I also had to try shooting images for assembling for panoramas in Photoshop. That seemed to work well also. You just have to overlap more than usual. It has a 2X optical zoom, but up to 10X digital zoom. You probably would not want to print the digital zoom images too large, but handy for documentation or for the web.
Single Image @ 1.5mm (Full Frame Equivalent 13mm)
2 image Panorama, assembled in Photoshop @ 1.5mm (Full Frame Camera Equivalent 13mm)
Single Image @ 4.3mm (Full Frame Camera Equivalent 26mm)

2 horizontal image Pano – stacked, iPhone 11 Pro @ 1.5mm (Full Frame equivalent – 13mm)

Single Image @ 4.3mm, iPhone 11 Pro – (Full Frame Equivalent 26mm)
