 photoartflight
BRIGANTINE IPHONE MULTI-IMAGE PANORAMAS
Posted on January 8, 2021

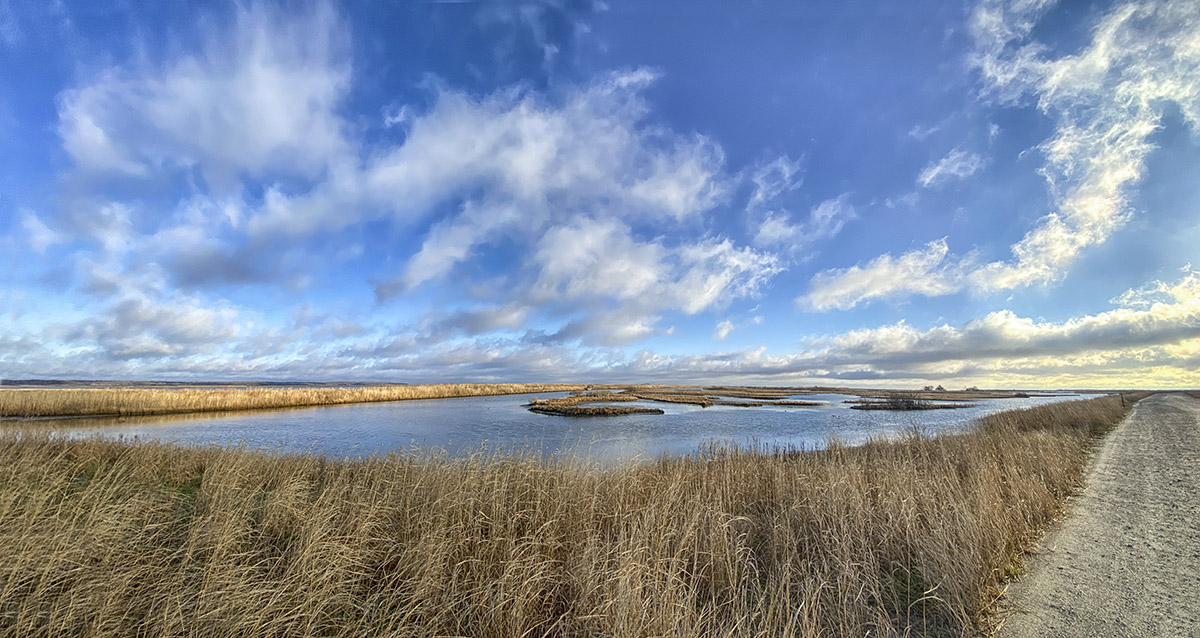
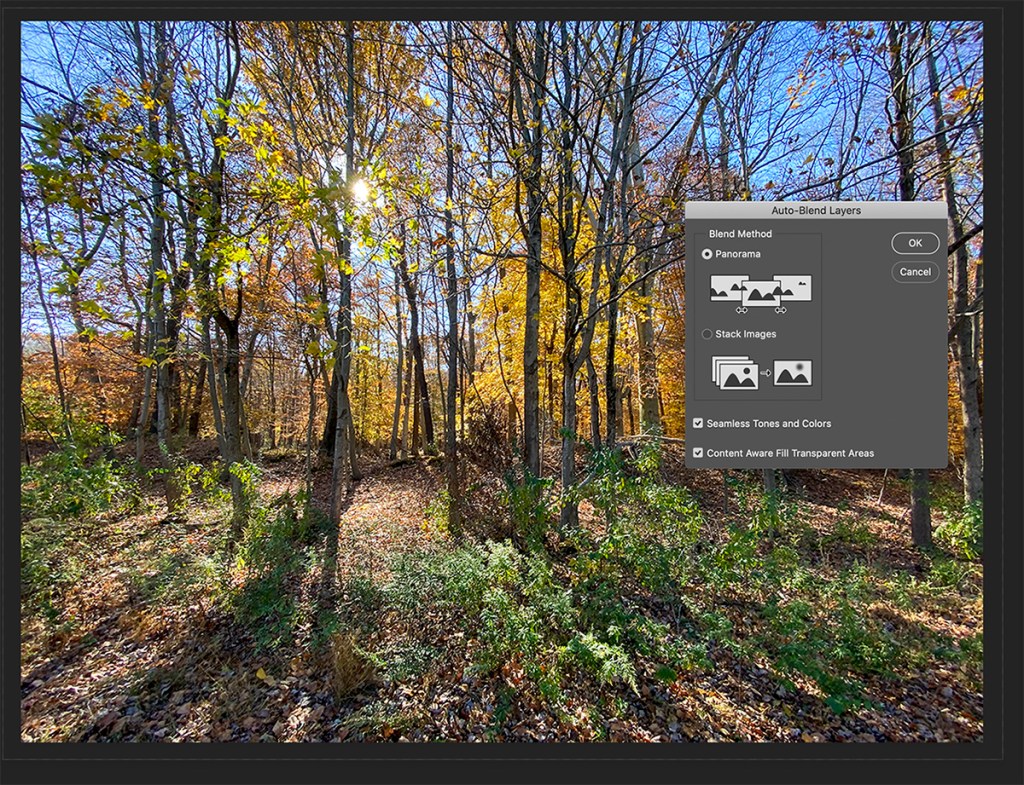
On our recent trip to the Brigantine Division of the Edwin B. Forsythe National Wildlife Refuge in Oceanville, NJ, I was traveling light. Mainly using a Tamron 150-600mm lens on a 1D mkIV, a 12-24mm zoom on a Canon R and my iPhone 11 Pro for multi-image landscapes & multi-image panoramas. The Canon R with the 12-24mm never made it out of the camera bag. I was having more fun shooting multi-image Panoramas on my iPhone 11 Pro. The featured image is 13 images shot in multiple images per row & then multiple rows with the iPhone 11 Pro & the 1.5mm lens.


Multi-Image iPhone Panoramas From Plainsboro Preserve
Posted on November 17, 2020

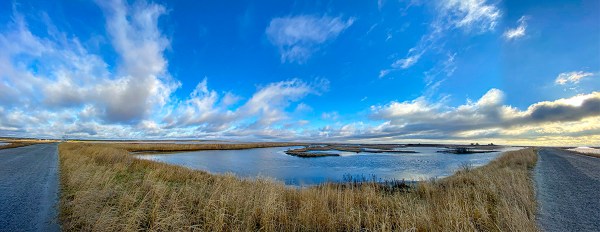
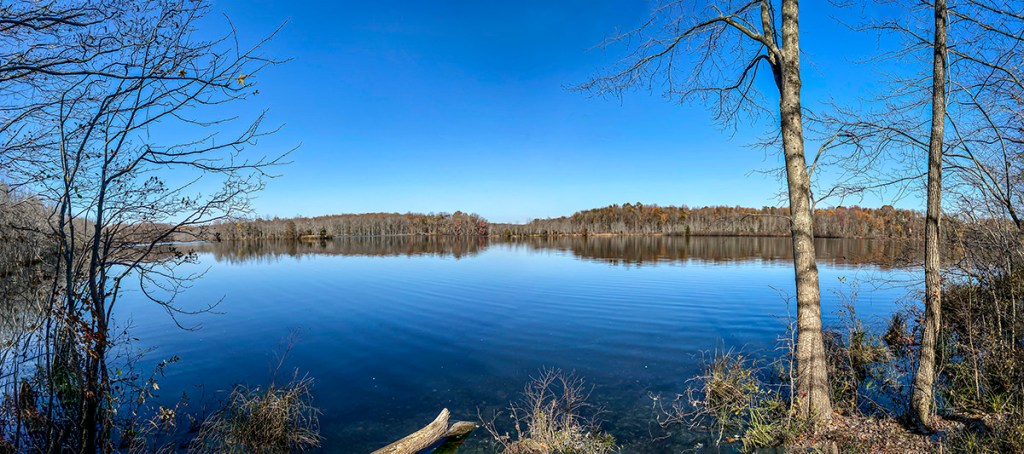
I like doing multi-image panoramas for my landscapes. But shooting with wider lenses on a Full Frame camera, I tend to get more sky & foreground in my images than the areas I want to have as the main subject. With an iPhone 11 Pro using the panorama feature you tend to get a distortion or a “bowing” effect in the middle of the image which to me looks strange or distorted. So for panoramas with the iPhone I shoot a series of overlapping horizontal or vertical iPhone images and “blend” them in Photoshop. Depends on the scene I am trying to capture as to iPhone orientation. If my subject is closer up I would use vertical images, if farther away I would use the iPhone horizontally. On the iPhone 11 Pro if I am using the 1.5mm lens (Field of View on a Full Frame Camera equivalent is ~13mm) I would shoot even more images for the panorama, with more overlapping on each of my images. If using the 4.3mm lens, I would overlap a little less. When using the 6mm lens I could use even less for the image I want to photograph. Basically you have to do a few and see what works best for you. Most of my Multi-Image iPhone panoramas are horizontal images. If doing a Vertical overlap the images more. The featured image is 10 overlapping vertical iPhone 11 images shot with the 1.5mm lens.
The iPhone Camera Lenses Field of View Equivalents:


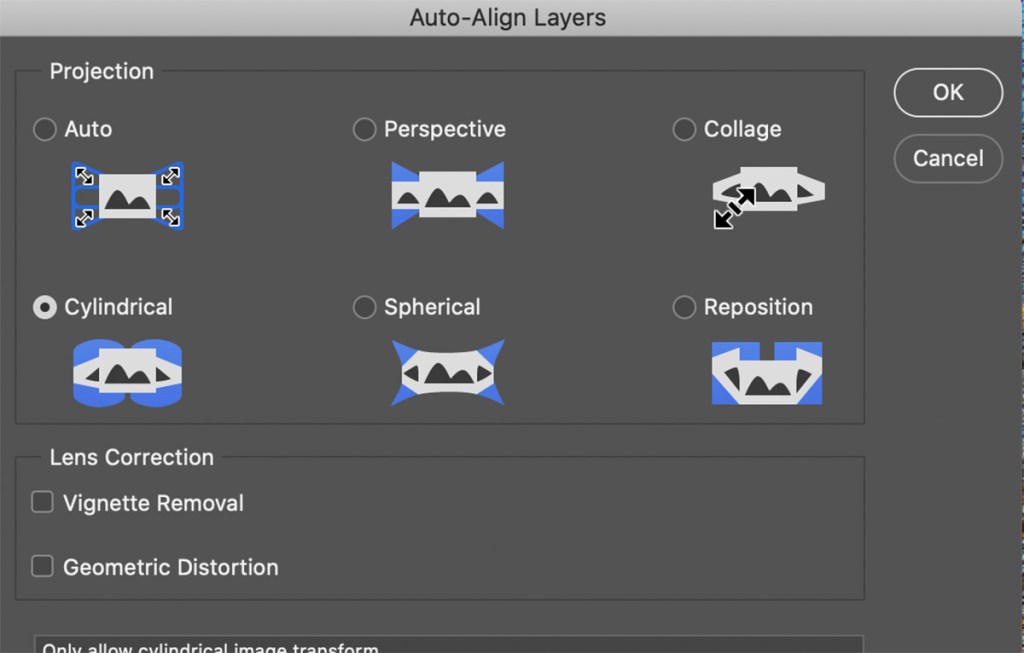
Photoshop Auto-Align Layers Window for Blending The Panoramas. Cylindrical seems to work well for iPhone 11 Pro multi-image panoramas, especially when using the 1.5mm lens.
Once you load all the images into Layers you have to Align the layers before blending. With the small lenses in the iPhone 11 Pro, I tend to use the “Cylindrical” setting most often because of the small 1.5mm, 4.3mm or 6mm lenses. But you may have different outcomes. For larger sensor cameras I usually use the “Auto” setting. Also you will have some white or blank areas usually in corners. So while “blending” the layers you can check on “Content Aware Fill” to let Photoshop Fill In these Areas Automatically. If you try one setting and do not like the effect, just go back in History and try a different setting. For Full Frame Digital Camera images I usually use the “Auto” setting.
