 photoartflight
Garter Snake Shed Skin
Posted on June 3, 2020
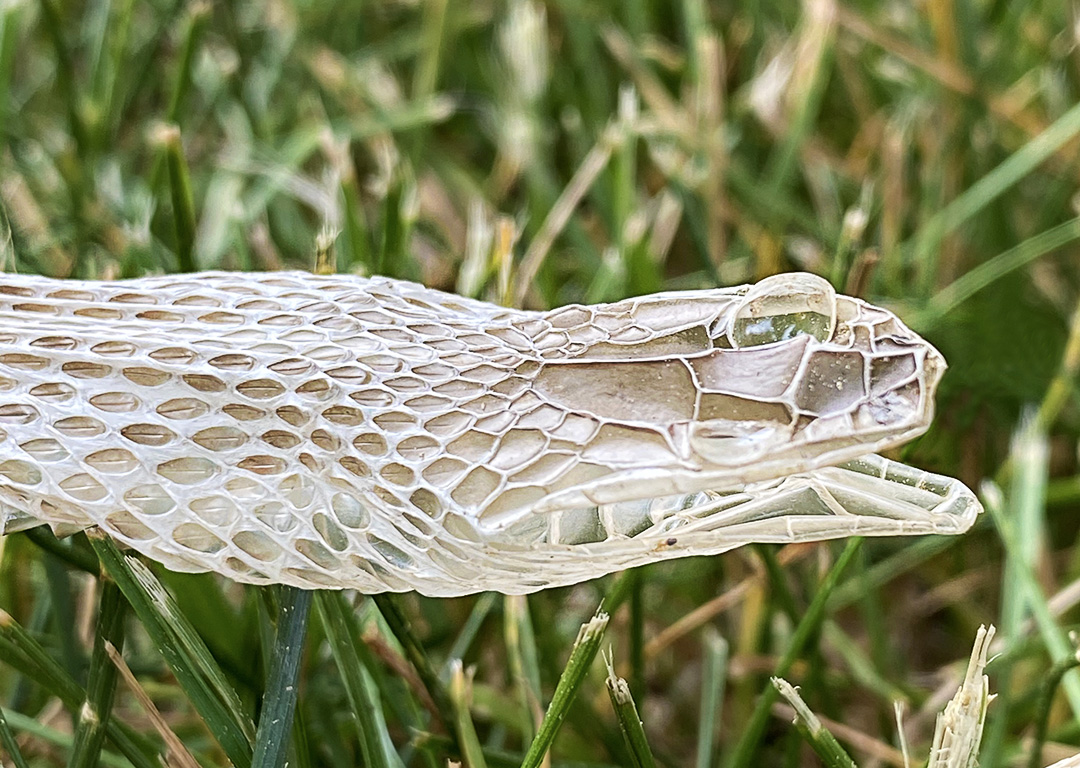
As we were taking a walk in our community I noticed a shed snake skin in the grass near the sidewalk. The featured image is a closeup side view of the head area. Images were taken with my iPhone 11 Pro with the 6mm lens, 4:3 image format, (Full Frame Field of View equivalent 52mm). I never have seen a shed snake skin before in person, only in photos. It almost has the look of a 3D computer modeling display!

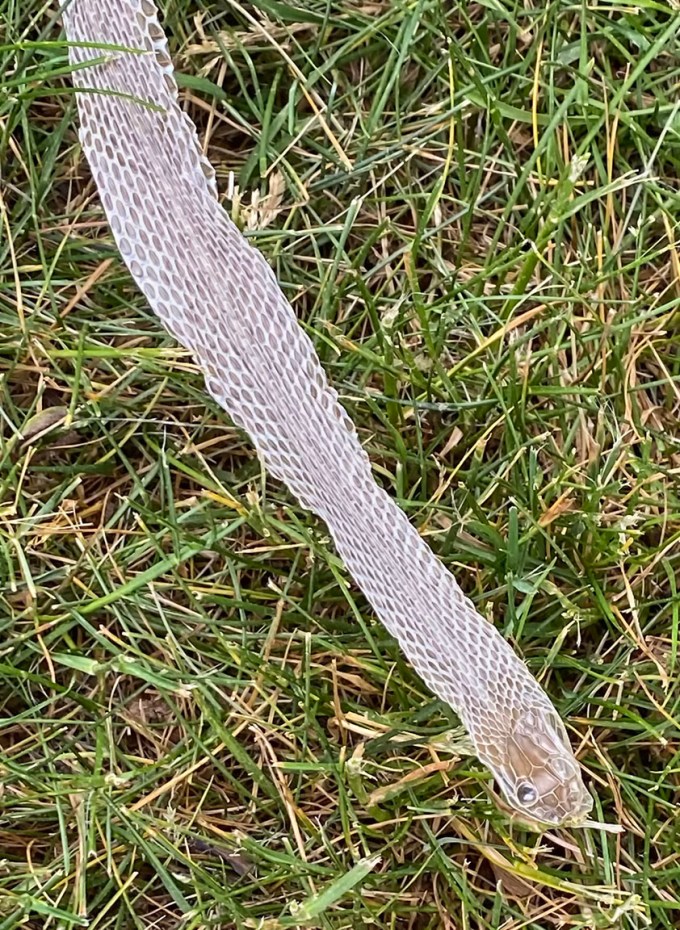
Full view of shed skin – iPhone 11 Pro, 6mm lens, 16×9 format
Closer image of Head Area & Some Body, 6mm lens, 16×9 format (with slight crop of image)
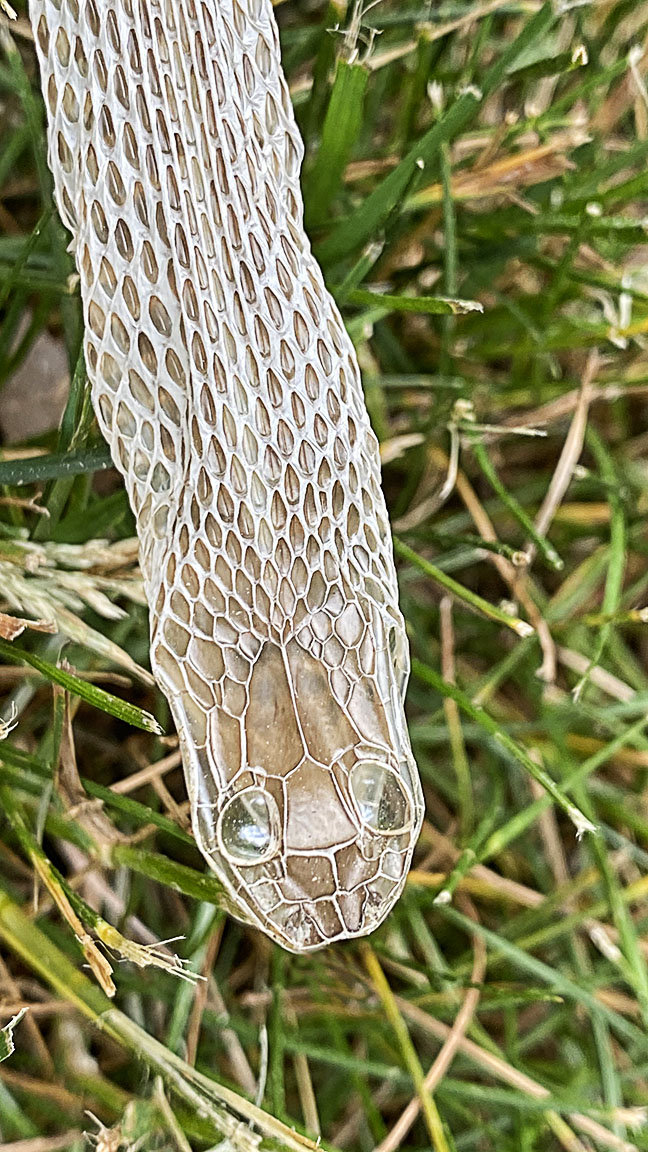
Closeup Head & Eye Area of shed Garter Snake Skin. iPhone 11 Pro, 6mm lens, 16×9 format, cropped slightly.
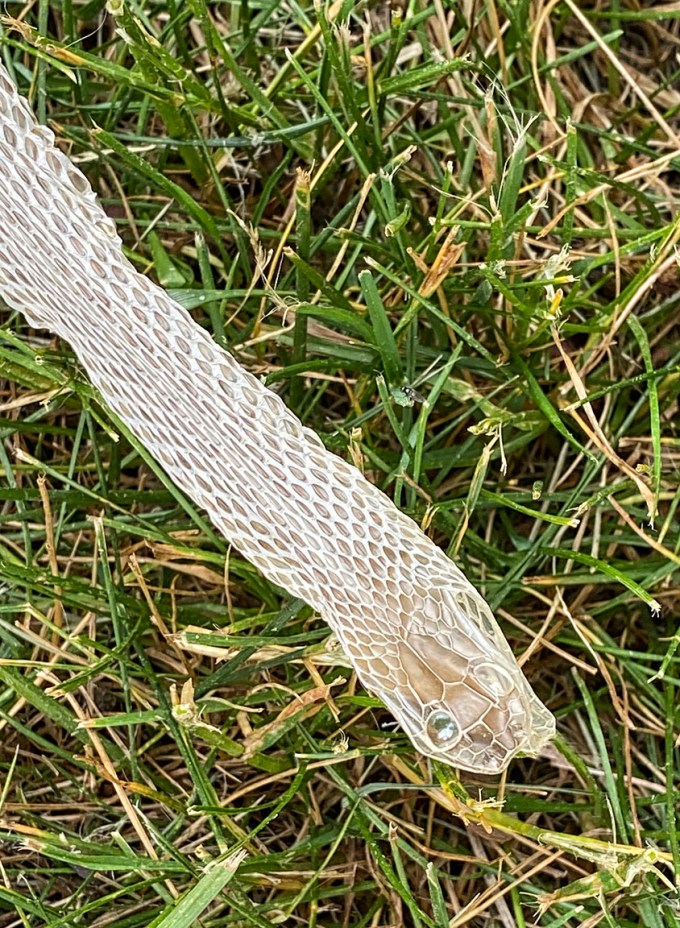

Another Closeup Head & Eye Area of shed Garter Snake Skin. iPhone 11 Pro, 6mm lens, 16×9 format, cropped slightly.
As garter snakes grow, they must shed their skin. Unlike other creatures like humans, a snake’s skin does not grow along its body. Its scales are made of keratin, which is the same protein found in our fingernails. When garter snakes slither along the ground, their scales scrape on rocks, dirt and other debris. This movement is important to help snakes shed their skins. Snake skin usually sheds off in one continuous piece, starting around the lips and ending at the tail.
The young garter snake grow rapidly as they feed on prey items such as insects, amphibians and earthworms. As they grow, they have to shed their skin approximately every four to five weeks. As they mature and grow into full-sized adults between 2 and 4 years old, the amount of shedding declines since they are not growing as rapidly. Mature garter snakes shed a few times each year, due to wear and tear on their scales. In a healthy garter snake, the entire shedding process takes a little longer than one week.
Shedding Skin –
The initial shedding process involves the garter snake secreting a milky fluid that helps separate the new skin from the old skin. A garter snake hides and won’t eat since he is blind when he sheds. When ready, a garter snake rubs his mouth on the ground to help push up the older skin. He then slowly makes his way out of his old skin by slithering along the ground, encouraging the skin the retract inside-out as it comes off in one piece.
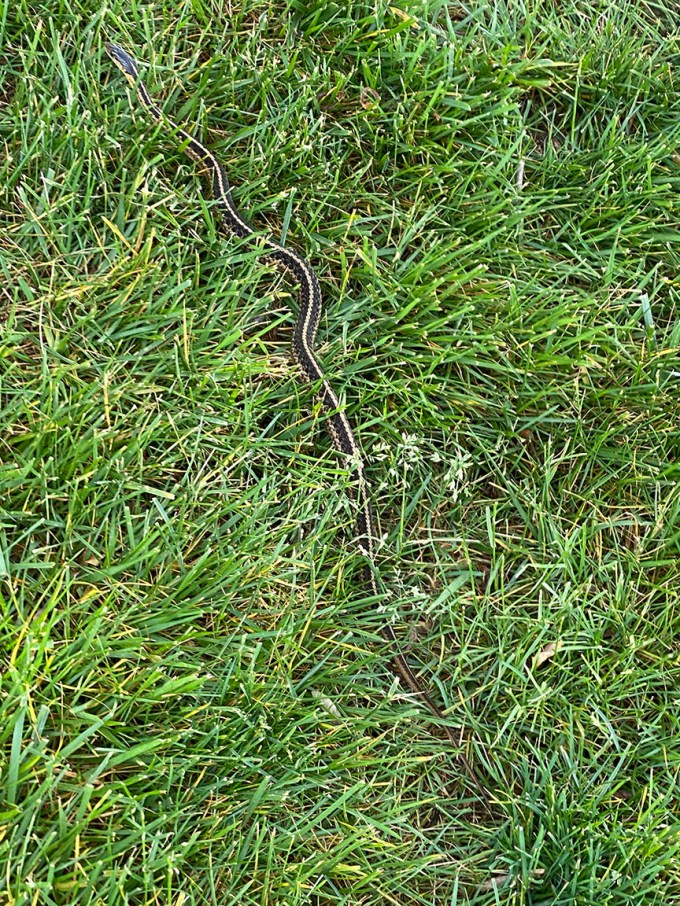
Garter snake that was by the shed skin, photographed the next day. It seemed like we interrupted the Garter Snake eating it’s shed skin.
Eastern Garter Snake In Garden
Posted on May 15, 2020

We had started to put a few plants in our gardens yesterday so we went out to take a look today. We were surprised to see an Eastern Garter snake stretched out along the edge of one of the garden beds. The featured head image was shot with an iPhone 11 Pro, standard 4:3 format, 6mm lens (Full Frame Camera Field of View equivalent focal length = 51mm). I then switched to the 16×9 image format with the 4.3 lens (Full Frame Camera field of view equivalent ~26mm) to get an image of the whole snake along the edge of the garden bed. All focal length info listed above are from notations from the equivalents listed when opening the images in Adobe Bridge & Camera Raw info. It is nice to have such a versatile camera in a phone you usually always have with you. Between the 3 different lenses and different image formats it comes in handy for those unexpected image opportunities! Is it as good as a “Real” Camera? No, but if you are careful and use Adobe Camera Raw carefully, it does an amazing job! The more you use it the better the results. Especially for multiple image & multiple rows for landscapes!

You Never Know What You Will Find In Your Yard
Posted on April 26, 2020

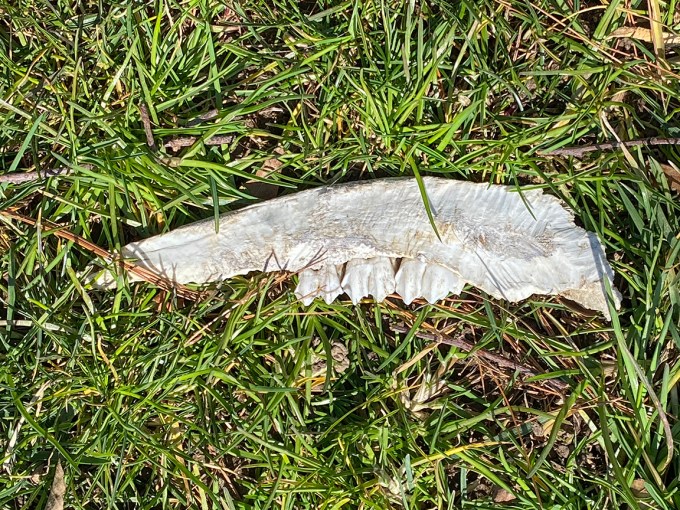
I was surprised to see these bones under a tree in the corner of my yard. There is a wooded area on the other side of my sidewalk where we used to see a lot of turkeys, deer & foxes. But it is chain linked fenced from the larger woods beyond. The featured image is also a 2 image iPhone panorama.
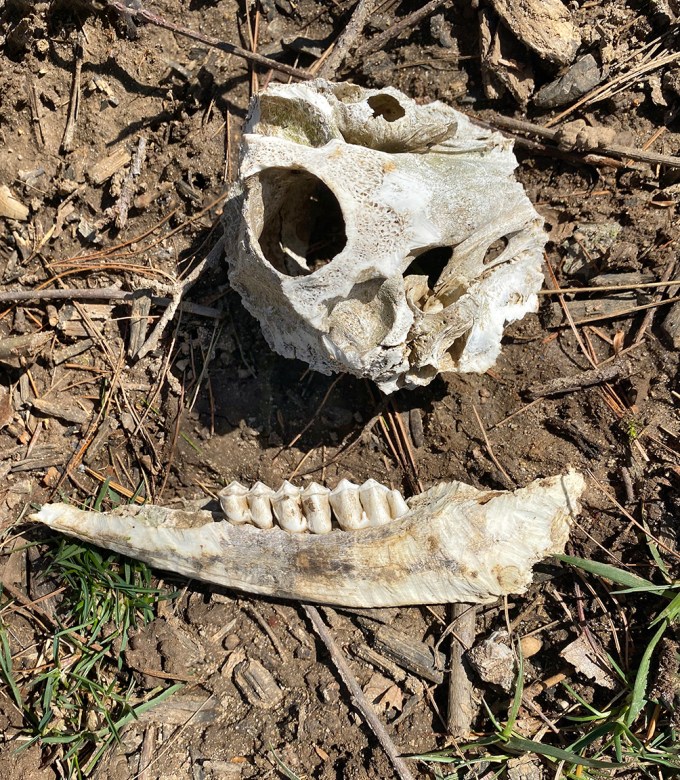
2 image panorama, assembled in Photoshop, iPhone 11 Pro
All Flags Half-Staff For Victims Of COVID-19
Posted on April 24, 2020

2 image panorama of the Flags at Half-Staff at the Club House in our community. Governor Murphy signed Executive Order No. 114, ordering the flag of the United States of America and the flag of New Jersey should be flown at half-staff at all State departments, offices, agencies, and instrumentalities indefinitely. This started on Friday, April 3, 2020, in recognition and mourning of all those who have lost their lives and have been affected by COVID-19.
I had trouble photographing the flags because of the wind & the flags not blowing nicely or even in unison. So I shot the main scene view with 2 vertical images on my iPhone 11 Plus. Then I shot a video of the blowing flags. Back at my computer I combined my 2 main images into a slight panorama to get both street lamps bordering the image. I then did screen grabs from the video and selected the best blowing Flag position of each Flag. I then placed the grabbed images with Photoshop in the shot for my final image. I also was going to clone out the slight vertical cloud to the left of the flag pole, but decided to leave it in. I am surprised at the versatility and quality of the images from the iPhone 11 Plus. Also the quality of the flags from the video.
7 Image iPhone Panorama
Posted on April 6, 2020

Another panorama from our trip to Florida in February. For this panorama I chose to shoot with the 1.5mm lens on my iPhone 11 Pro. This would be an equivalent field of view of 13mm on a full frame camera. I shot 2 rows of images, top row 4 images and bottom row had 3 images. Somehow I miscounted on the bottom row, but it worked out anyway. I selected the files and adjusted the phone jpegs in Adobe Camera Raw before opening them into one layered file in Photoshop. I have my Adobe Camera Raw setup to open jpegs as raw files with settings. I tried setting the iPhone to shoot HEIC raw files, but that just slowed down the camera and did not see much of a difference in quality only a much larger file size. The panorama images below are multiple images in one row, combined and blended in Photoshop.
Another Multi-Image version of the same view. This time a one row, multi-image blend shot with the 1.5mm lens. (Each Image in Series Full Frame Equivalent 13mm)
2 image iPhone panorama, shot with 4.3mm lens. (Each Image in Series – Full Frame Equivalent 26mm)
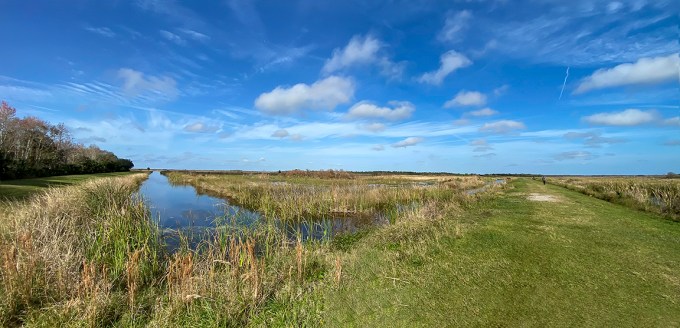
Another Lake Woodruff NWR Landscape
Posted on February 26, 2020

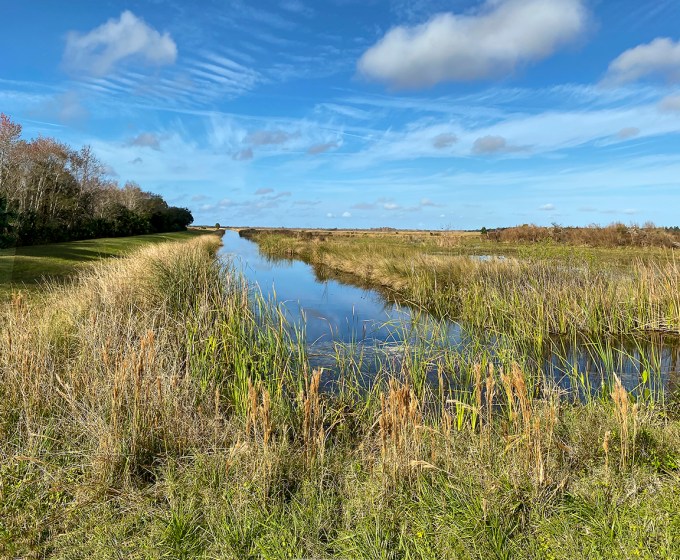
Here is another 2 image iPhone Landscape panorama from our visit to Lake Woodruff NWR in Florida. The 2 images were brought into Photoshop on 2 separate layers, then I let Photoshop align and blend them into one final image. In this image if you look closely you will see 9 Black Vultures on the path. The images were shot with the 4.3mm lens (full frame FOV equivalent would be 26mm). In previous visits years ago the vultures would sometimes follow you around on the paths. When this first happened it was a little unnerving to have a large bunch Vultures follow you for a quite while. As we walked they were making a hooting noise. At least this time they flew away if we walked close.
14 Image iPhone Lake Woodruff National Wildlife Refuge Landscape Panorama
Posted on February 14, 2020

For this landscape I used the 1.5mm lens on the iPhone 11 Pro and shot 14 images. (Full Frame Camera Field of View equivalent is 13mm). I brought the files into Adobe Camera Raw to adjust the files and pull out detail and balance my settings. Than I open them into one layered Photoshop file with each image in a layer. Next in Photoshop I align and blend Automatically the 14 images into one final blended image. I still have layered sections and save the layered file just in case I need to touch up something. Then I flatten the image for the final image.
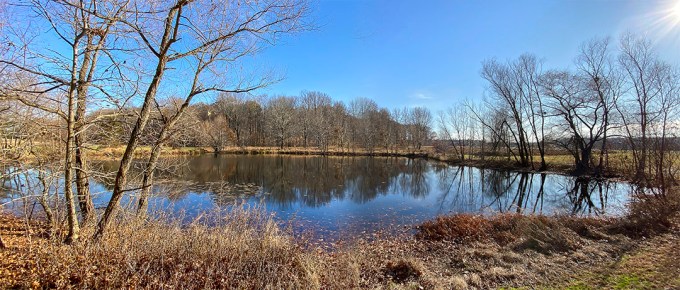
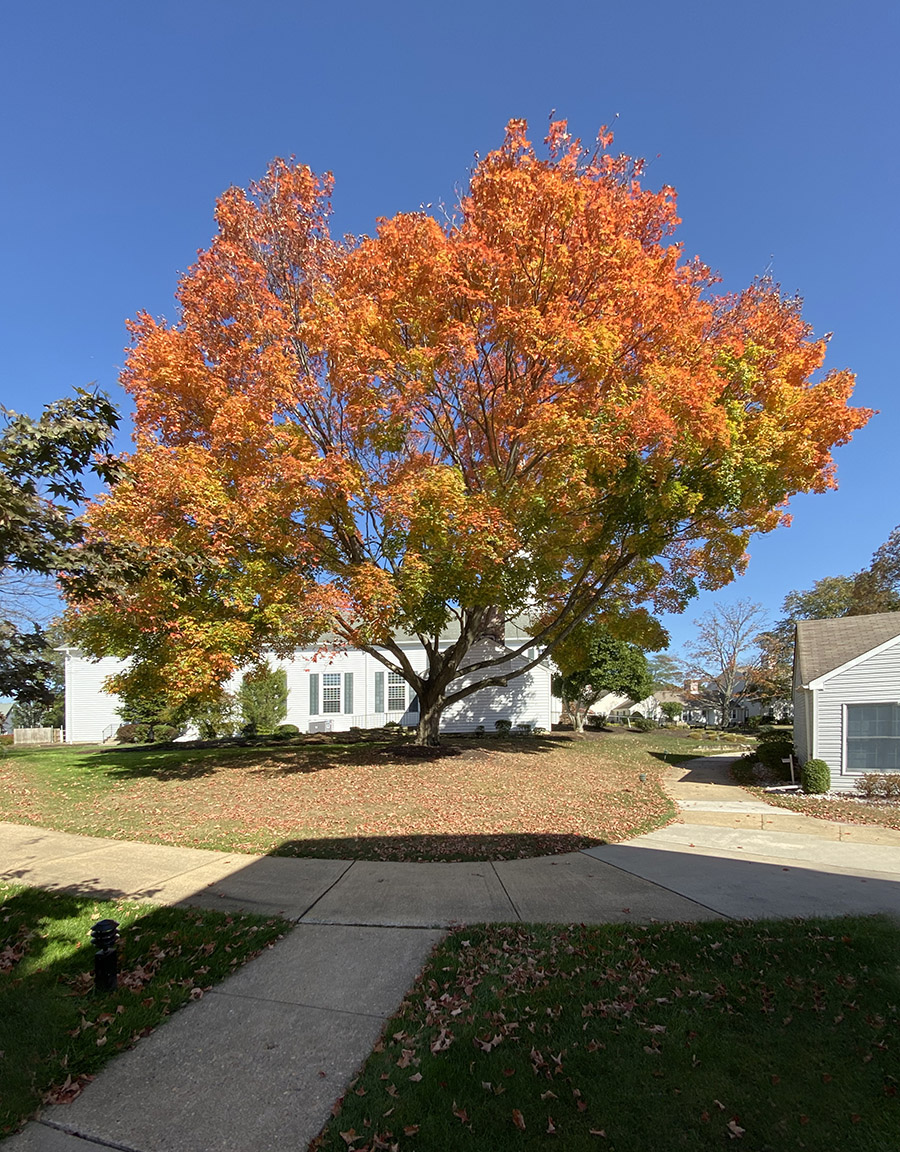
Fall Walk In The Woods
Posted on November 28, 2019
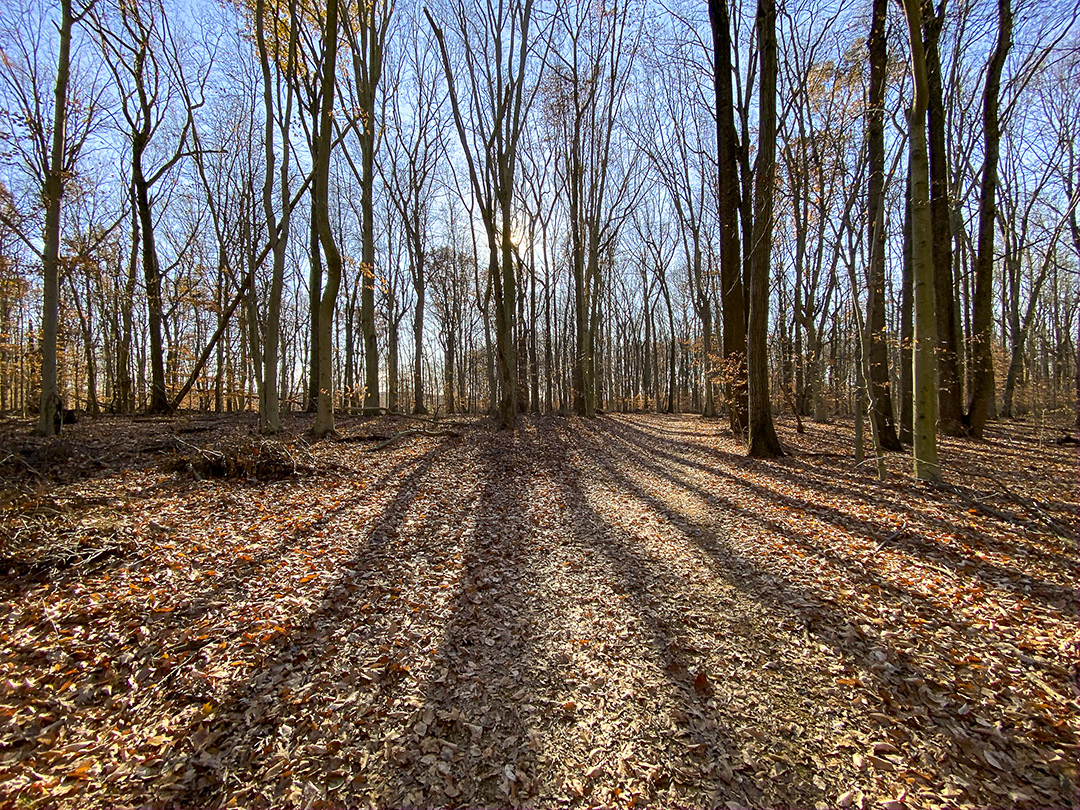
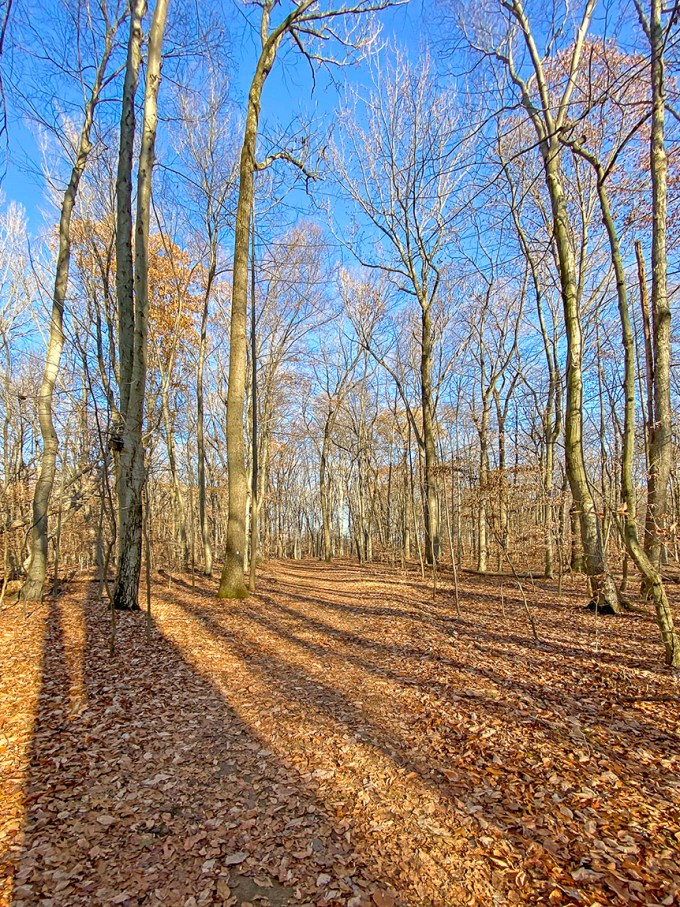
We took a walk through the woods at a local park just to get some fresh air. I only had my iPhone 11 Pro with me since I was not thinking anything would be interesting to photograph. The sun was low and most of the leaves were off the trees, but the shadows of the trees were amazing. The iPhone did a nice job photographing in a variety of lighting conditions. After getting use to the new iPhone for a while now, I tend not to use the pano mode as much, preferring to shoot multiple images to assemble my own wider or panorama views. Even with the 1.5mm lens selected (Full Frame Equivalent 13mm), I want more width without more height. On this walk I had enabled the phone to shoot HEIC Raw files instead of jpeg files. This way I supposedly had true Raw Data to work with in Adobe Bridge before opening in Photoshop instead of enabling Adobe Camera Raw to open jpegs as Raw files with settings. Also for certain scenes I like using the 16:9 capture mode setting for longer scenes without using the 4:3 usual capture. The 16:9 does not work with the 1.5mm lens.
1.5mm lens

1.5mm lens
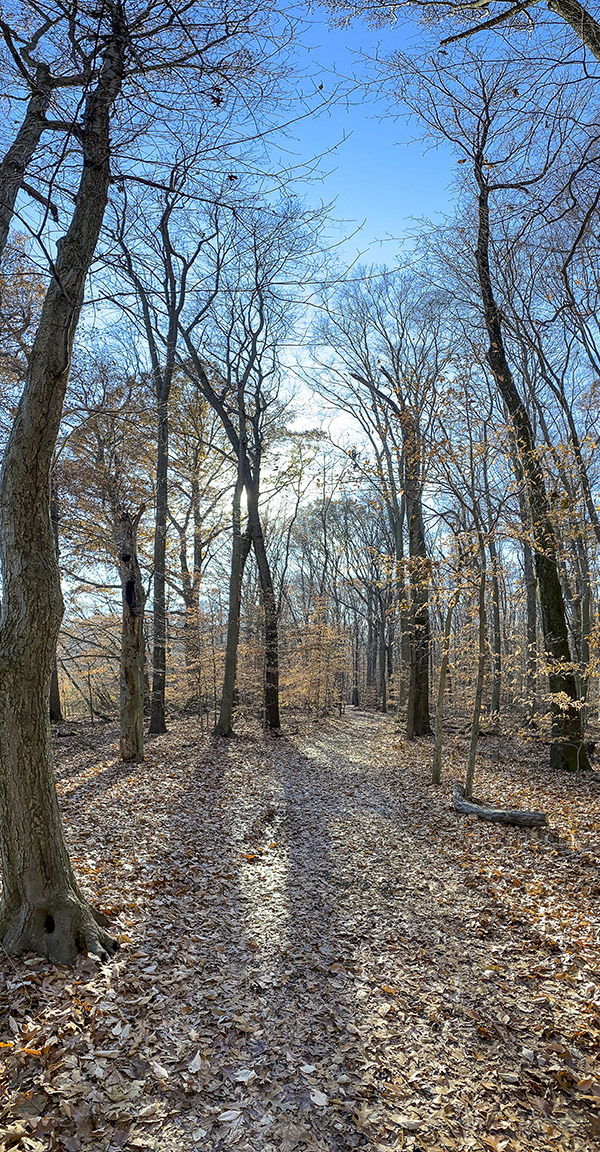
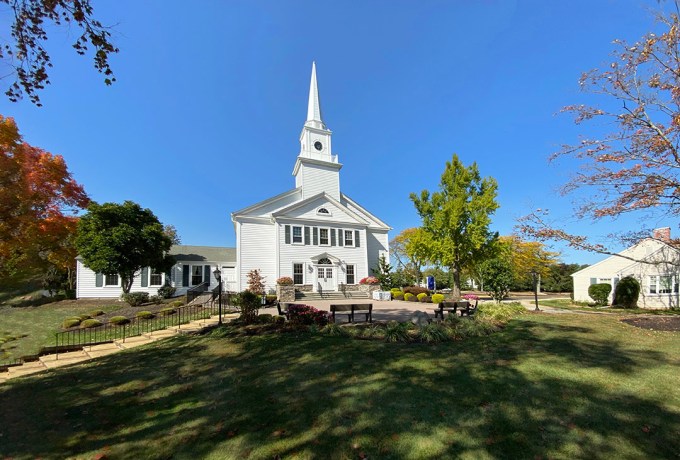
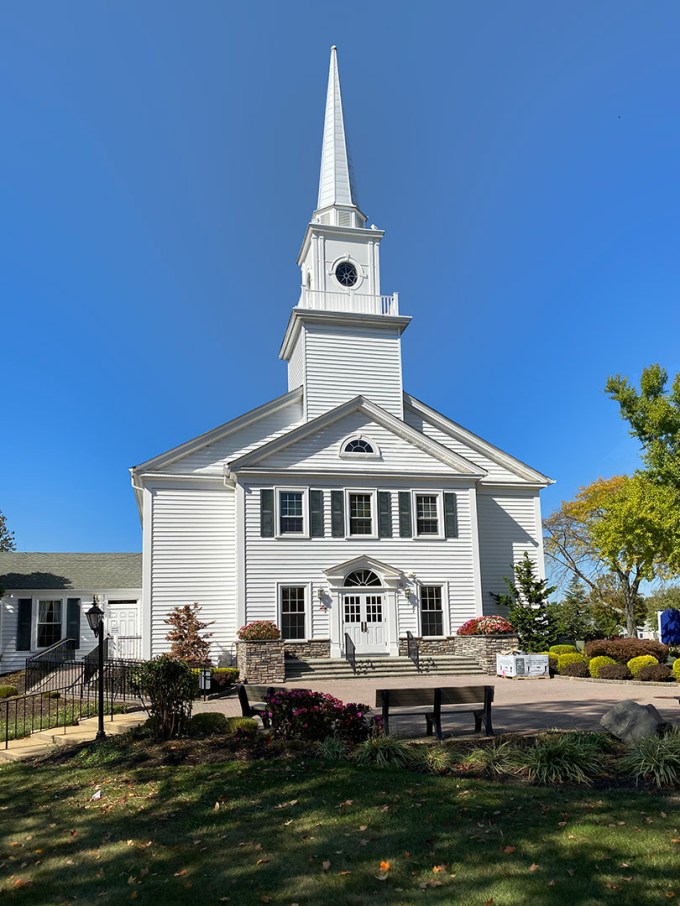
16:9 format – 4.3 lens

2 image panorama – 4.3mm lens

4.3mm lens 16:9 Format
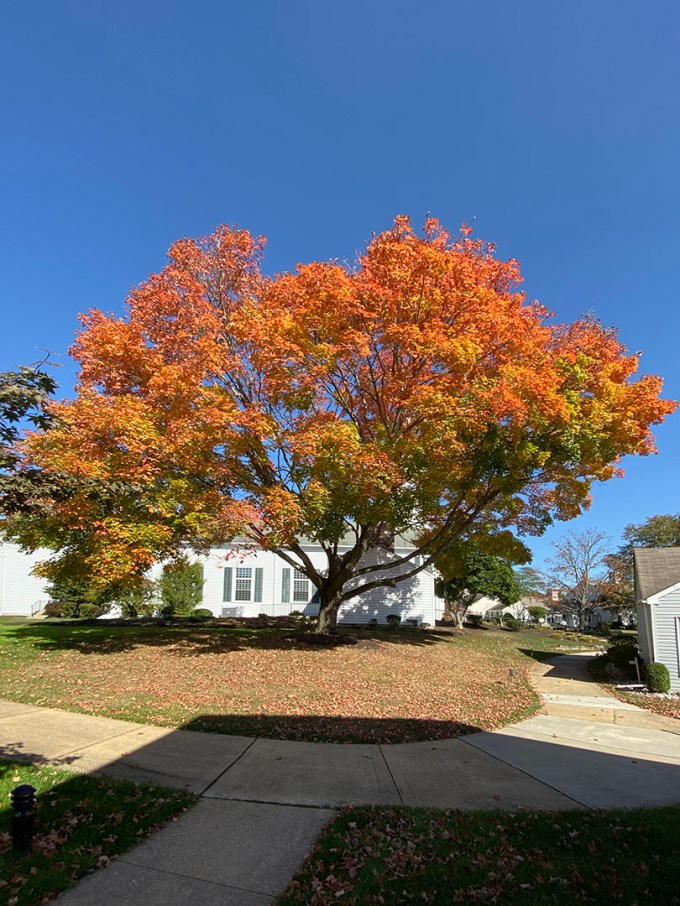
2 image panorama – 1.5mm lens – assembled in Photoshop

2 image vertical panorama – 4.3 format

4.3mm (26mm Full Frame Equivalent) 16:9 Camera Format
i Phone Panoramas
Posted on November 25, 2019
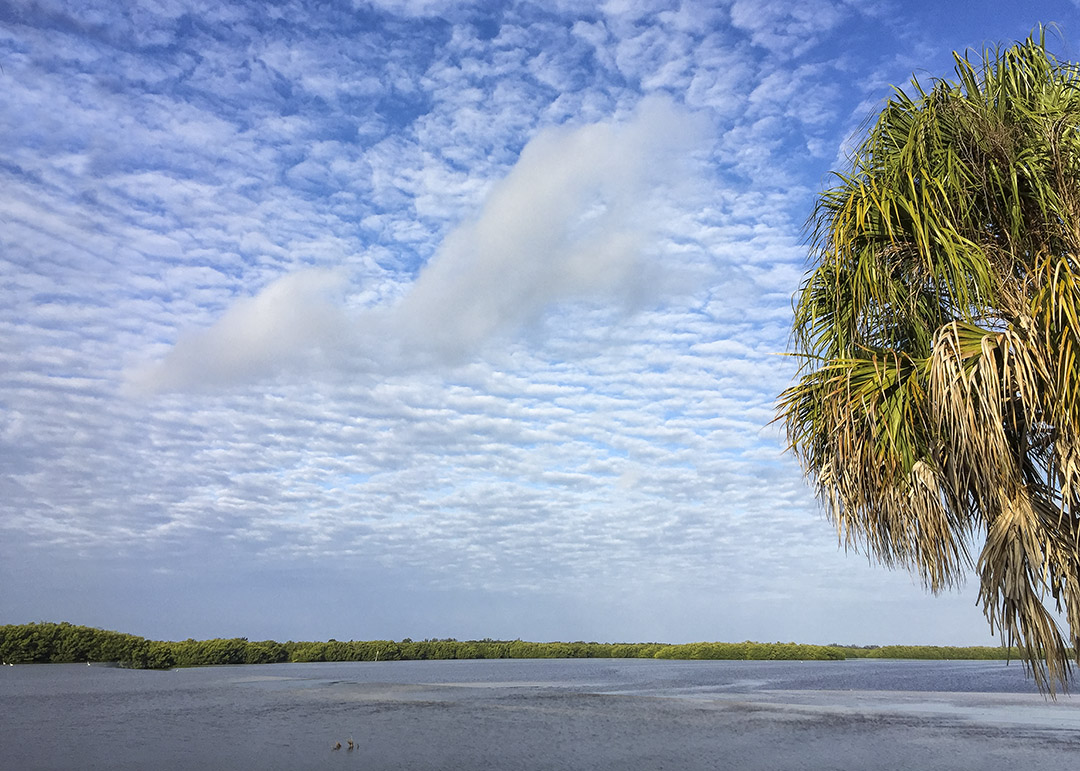
I use 2 different methods when using my iPhone for panoramas (or for images just requiring a slightly wider view like the featured image). The examples here are with my older iPhone 6 when I was in Florida in the Spring. The iPhone 6 had a 4.2mm lens which is equivalent to a Full Frame camera lens Field of View of 29mm. Many times you get a “curve” on the horizon and a distinct “Curve” and distortion on the ends when using the panorama feature on the iPhone 6. It really stands out if you are on a road that is straight left & right of your position and you are basically shooting a pano looking down the road to the left moving the phone down the road on the right. You get a distinct “bowing” look to the image as in the last photo in this post. Sometimes you can say it is an interesting effect, but not really ideal for the image. How close the objects are in the center has another set of problems because the far left & right are farther away and with a wide lens on the iPhone distortion looks more prominent. Because of this sometimes I take 2 (or more) individual images with my iPhone and use Photoshop to blend them for a panorama (or just a slightly wider view than the standard 1 image). I do this instead of the Pano mode in the iPhone which tends to distort the horizon line. The featured image is just a little wider so the tree on the right is more in the image. With the new iPhone 11 Pro, I have 3 lenses so I can shoot much wider than the older iPhone with the 1.5mm lens (Full Frame Camera Equivalent is ~13mm). In the examples below I also used the “Warp” feature in Photoshop (Edit>Transform>Warp) to straighten out the horizon somewhat which also can get a slight curve to the horizon in the image. I also have my system setup to open jpegs from the iPhone in Adobe Camera Raw to have even more options in adjusting my files before I even open them in Photoshop. Doing it this way, I can adjust the settings of the jpeg file, sort of treating it like a faux “Raw” file. It seems to really work well with my new iPhone 11 Pro. But these examples are from the older iPhone 6.

2 Horizontal Images, stacked vertically for more clouds

iPhone 6 – 2 image pano Stack for a little more clouds

iPhone 6 – 2 image sunrise Pano for more width (Horizon Line Corrected somewhat in Photoshop)
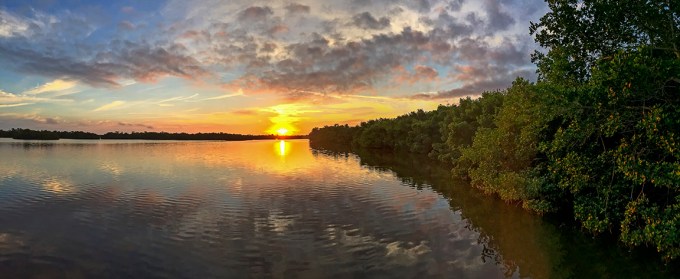
iPhone 6 – 2 image sunrise panorama, with more overlapping of images, assembled in Photoshop. This give a little more on the left & right sides. Sometimes you lessen the “curve” arc of the pano mode by shooting 2 single images and blending them then using the “Pano” feature.
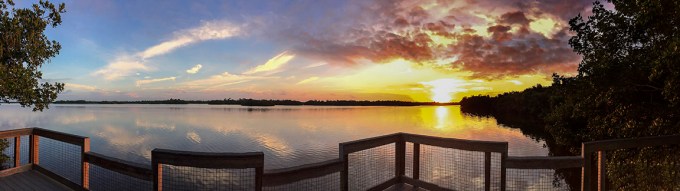
Panorama made with iPhone 6 showing “warping curve” distortion of railing on deck platform by just using the Pano feature on the phone. (Horizon line here was Corrected Somewhat in Photoshop)

iPhone 6 Panorama shot @ Blackwater NWR Wildlife Drive – Showing distortion of road (on left and right) by just using the pano feature while standing on the road.
Test Images iPhone 11 Pro
Posted on October 16, 2019
My old iPhone was not able to update to the newer software updates so I got a new iPhone 11 Pro. I was interested in seeing how the new camera would stand up for image quality. The new camera seems to work well to a point, but skies or solid color areas seem to have a slight darker center area in wide angle mode. But that is somewhat easy to change or fix in Photoshop. Some of the extreme wide angle shots also have a weird distortion, but again somewhat fixable. The file size seems to be also good for uprezzing (to a point) for larger printing. Overall I am quite happy with the performance. At the wide end the lens is only 1.5mm, but in full frame camera equivalent field of view is 13mm. So that is why you are seeing distortions that need some work in Photoshop. I also had to try shooting images for assembling for panoramas in Photoshop. That seemed to work well also. You just have to overlap more than usual. It has a 2X optical zoom, but up to 10X digital zoom. You probably would not want to print the digital zoom images too large, but handy for documentation or for the web.
Single Image @ 1.5mm (Full Frame Equivalent 13mm)
2 image Panorama, assembled in Photoshop @ 1.5mm (Full Frame Camera Equivalent 13mm)
Single Image @ 4.3mm (Full Frame Camera Equivalent 26mm)

2 horizontal image Pano – stacked, iPhone 11 Pro @ 1.5mm (Full Frame equivalent – 13mm)

Single Image @ 4.3mm, iPhone 11 Pro – (Full Frame Equivalent 26mm)
