 photoartflight
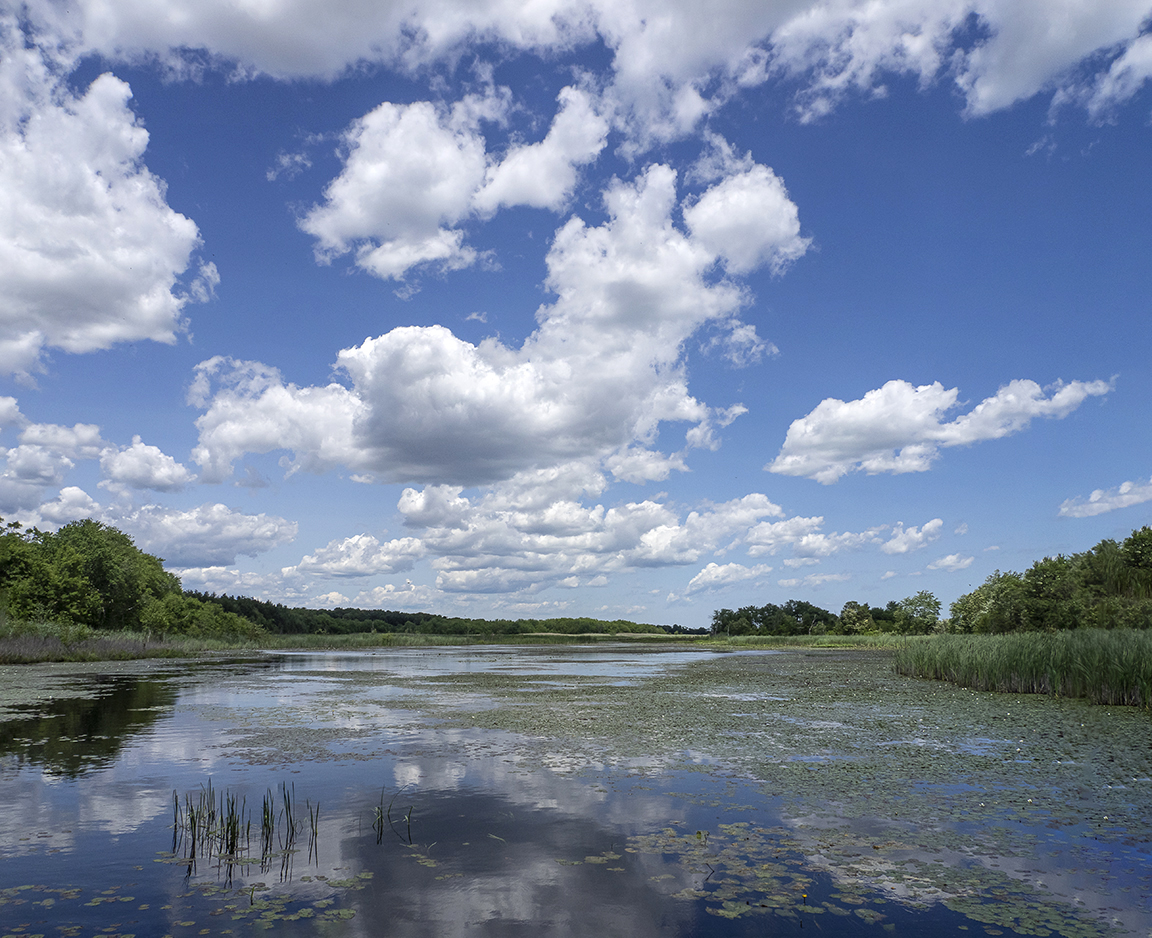
Davidsons Mill Pond Park Landscape Panoramas
Posted on October 22, 2019

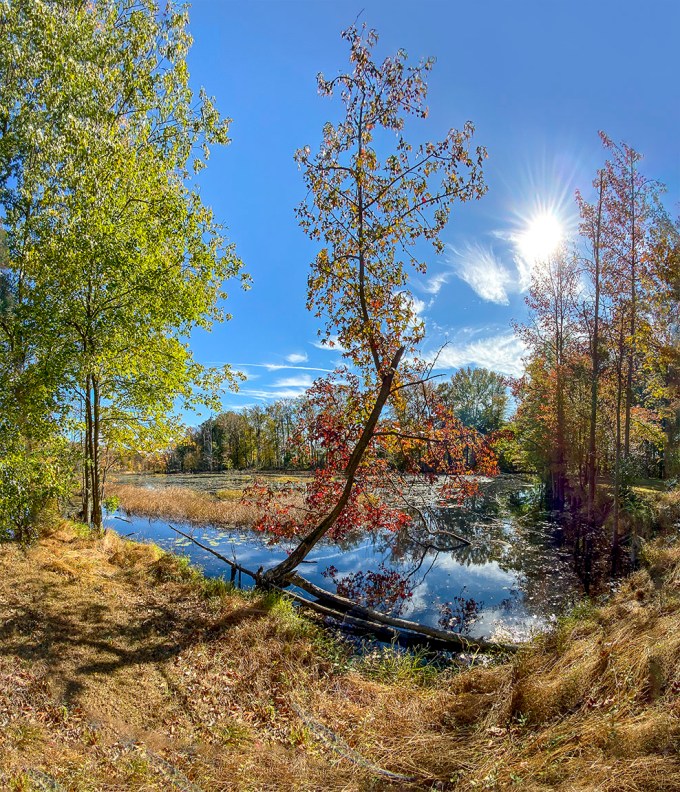
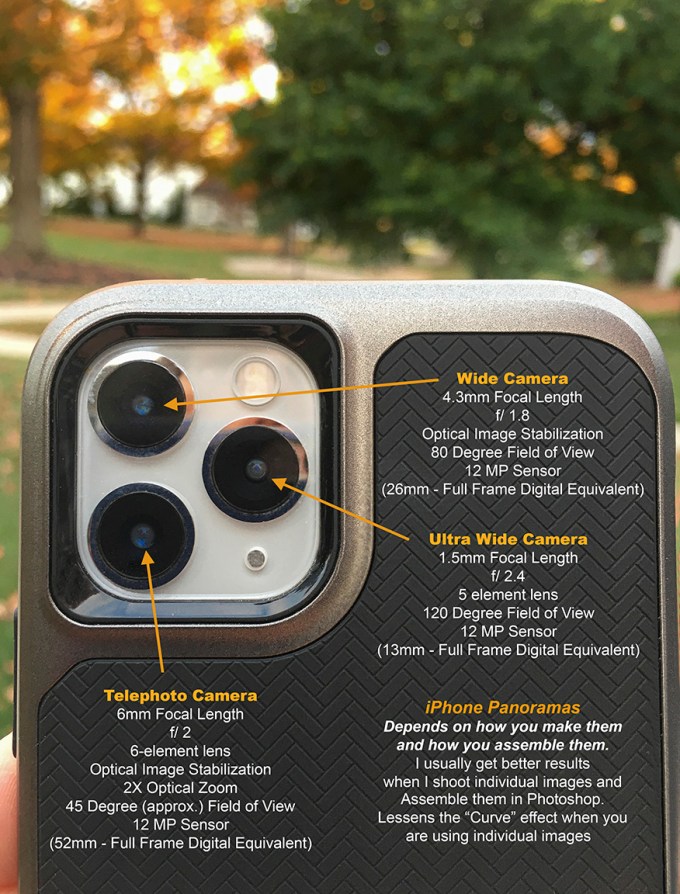
I am still working on trying different techniques or ways to work with iPhone images in Photoshop. Overall it is a fun and useful addition to my equipment. Especially if I am walking around with Long telephoto lenses and still have the option for other wider views with out carrying extra lenses or cameras. Because of the very small lens focal lengths some techniques are difficult to get the results I am expecting. But it is fun to see what the iPhone can do. If you enable Photoshop to open jpegs in Camera Raw, you can uprezz your iPhone images quite successfully as you are opening them. Also you can correct/adjust the image before you open the file. Seems to work well with the Panoramas also. Do not go way overboard in size, but used moderately this seems to work quite well. The featured image was captured using the panorama feature on the iPhone 11 Pro, using the 4.3mm lens (35mm equivalent 26mm). You have to be careful using the panorama setting because quite often you get a “bowing” effect in the middle of the image. Mainly because the far left and far right are way off to the side so it in the middle it is “closer” to you so it is a little bigger, giving an slight distortion in the middle. Sometimes you can minimize this by “shooting up slightly. The Smaller Panoramas are made from 2 vertical or horizontal images, layered in Photoshop and “combined or blended” with Photoshop. The biggest problem is being careful to not exaggerate “keystoning effects” when using the extremely small focal lengths that are in the iPhone (1.5mm, 4.3mm & 6mm) shooting more straight into your views helps. 35mm – full Frame equivalent mm would be 13mm, 26mm & 52mm. Any slight up or down angles seem to distort quickly, but can be controlled a little by shooting more straight into your subject. Slight adjustments in Photoshop also helps.

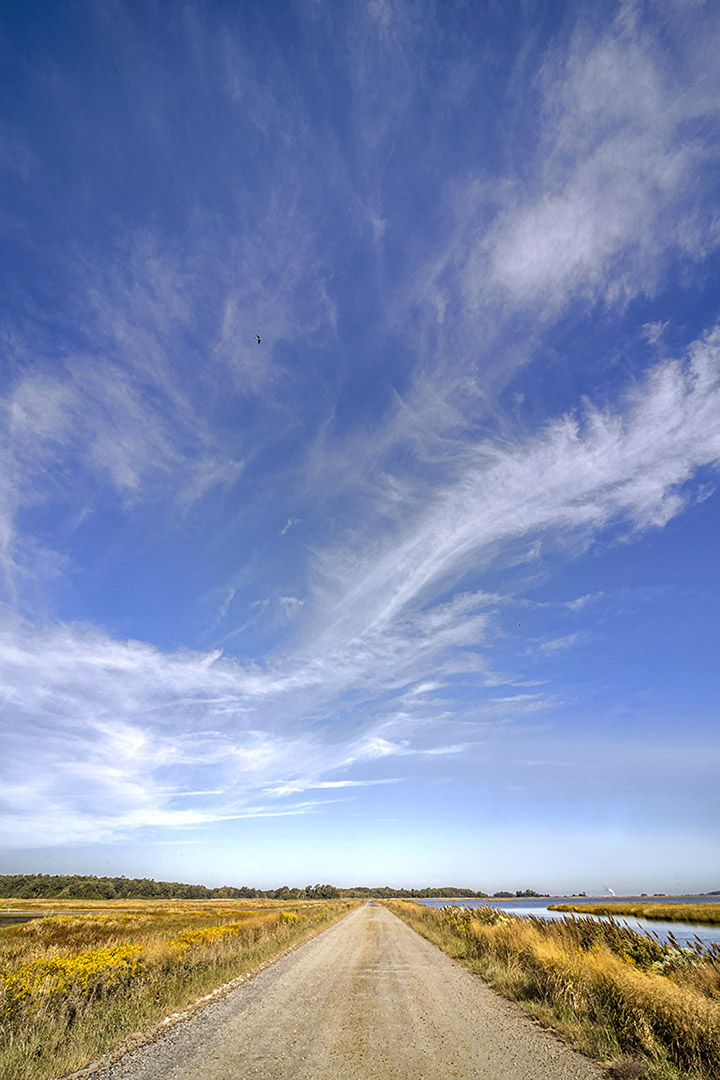
Narrower Panorama of featured image, first try before the featured image.

2 horizontal iPhone images stacked for panorama
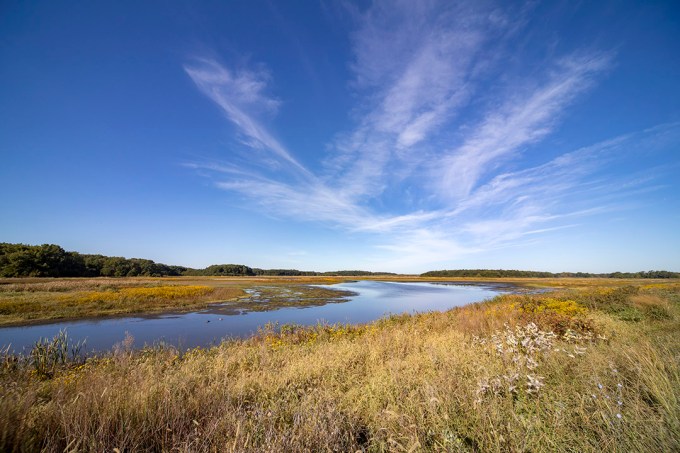
2 iPhone images for wider panorama assembled in Photoshop

2 iPhone images for taller panorama
Bombay Hook NWR Landscapes
Posted on October 3, 2019
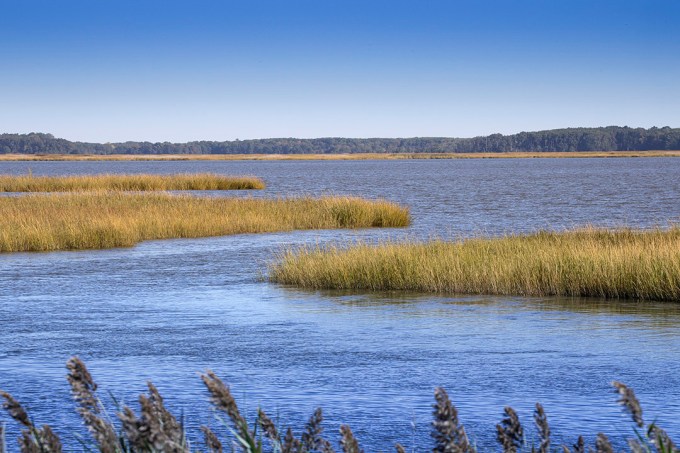
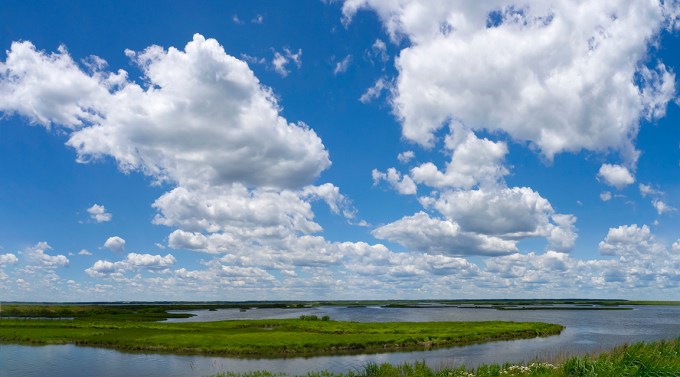
Here are a series of landscape & cloudscape images from a recent visit to Bombay Hook National Wildlife Refuge in Delaware. The featured image was shot @ 14mm along the Wildlife Drive.
Bombay Hook Landscape along Wildlife Drive – Shearness Pool @ 12mm, Canon R
Bombay Hook Landscape along Wildlife Drive @ 158mm, Canon R, Tamron 150-600mm
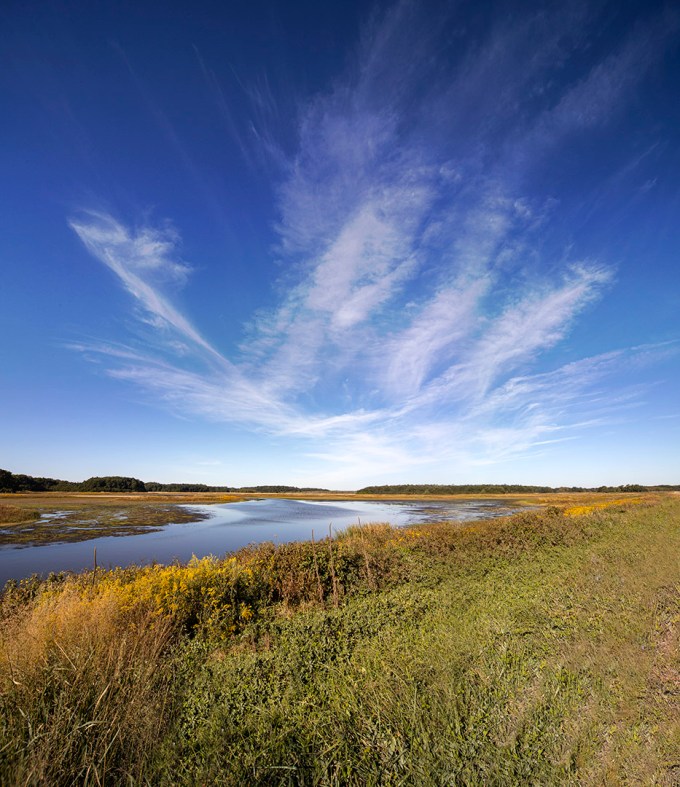
Bombay Hook Landscape along Wildlife Drive – Shearness Pool @12mm, 2 img pano, Canon R
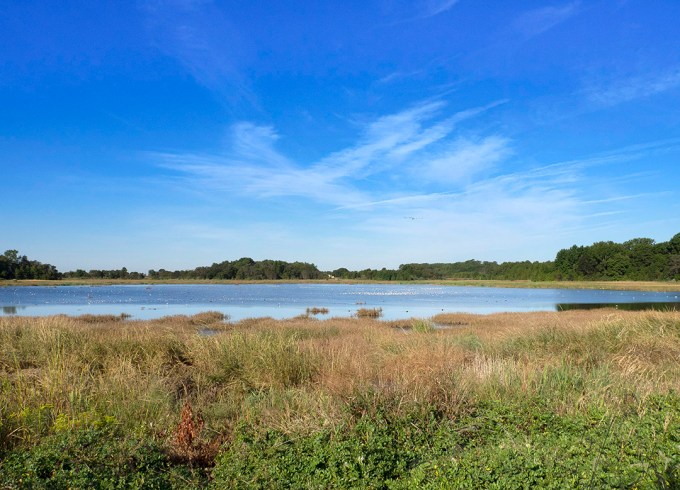
Bombay Hook Landscape, Shearness Pool along Wildlife Drive @ 14mm, Olympus OM-D
Plainsboro Preserve Lake
Posted on September 27, 2019
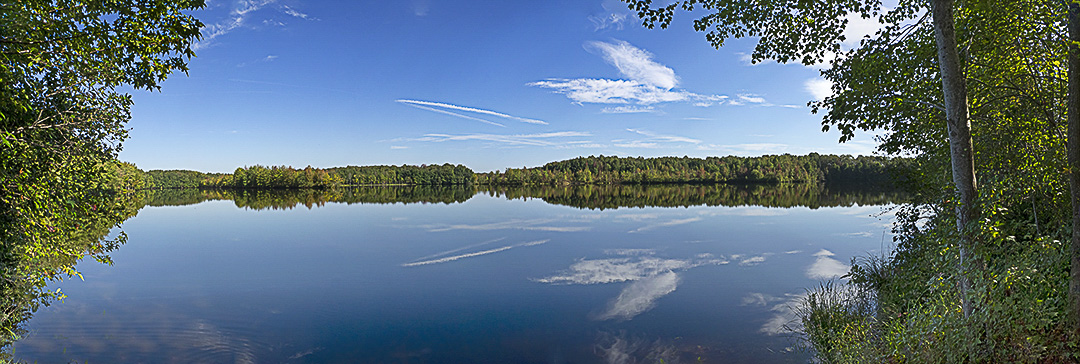
5 image Panorama of 50-acre McCormack Lake at Plainsboro Preserve. The Plainsboro Preserve is a collaboration with the Township of Plainsboro, the County of Middlesex,
and New Jersey Audubon. Close to 1,000 acres of lands were preserved by the County of Middlesex and the Township of Plainsboro that supports a diversity of habitats and wildlife, with one of the largest lakes in the area. The featured image is a 5 image panorama, each section shot @ 14mm on a m43 Olympus Camera. Then assembled in Photoshop. When doing panoramas with a m43 Camera, I tend to overlap each image more because of the smaller format. It just seems to lineup better and give better “blending” of the individual frames. On full frame cameras I do not have to shoot as many sections to get a “Smooth” overlap.
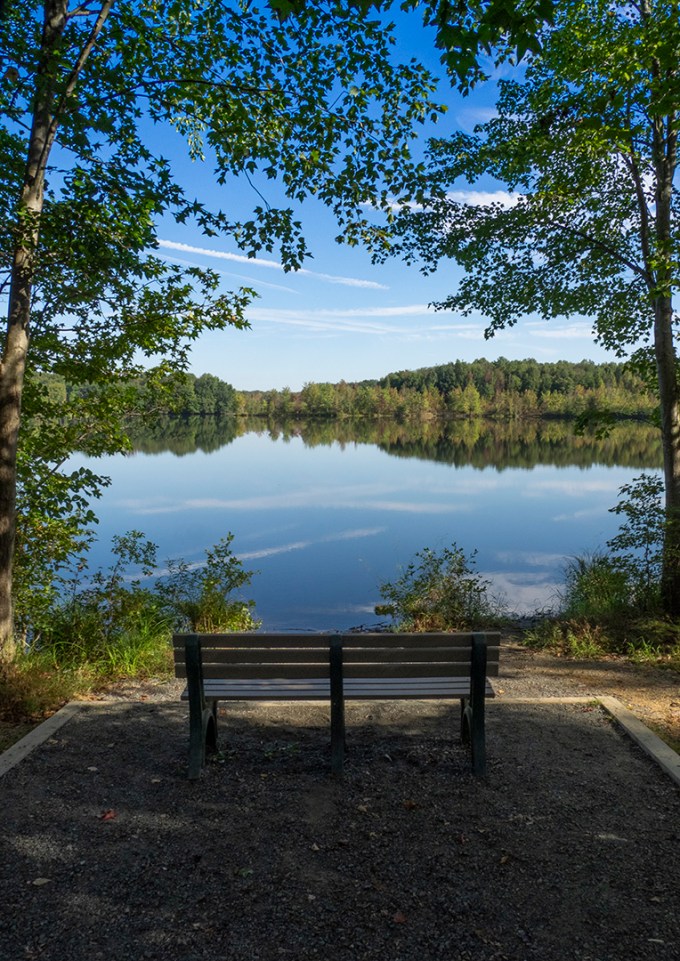
Bench view of McCormack Lake, 14mm m43 Format
Davidsons Mill Pond Park Panorama
Posted on September 2, 2019

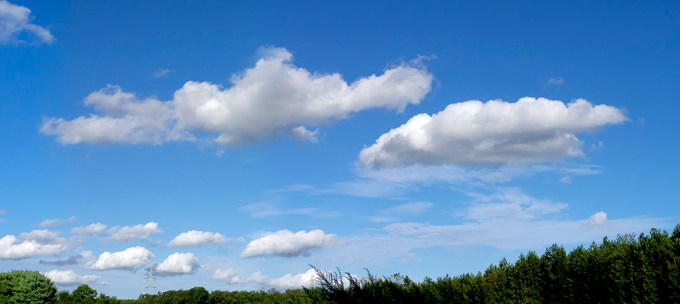
We went to a local park for a walk so I only took a lightweight camera setup, the Olympus OM1-Mk1 with a Panasonic 14-140mm lens. It is the perfect walk around camera when you are not going to photograph something very specific and just want something better than your camera in the iphone. Before we got to the trail through the woods, I saw this view I thought was interesting with the clouds. I shot a 3 image series to combine in Photoshop @ 14mm. It is interesting that when doing a panorama @ 14mm with a m43 format, you have some slight touchups to get a nice panorama. Full frame cameras seem to handle panoramas better. It also seems worse if you do even more over-laping frame sections. So I shoot more frames and then just pick a few to use for the final panorama. But this way I have choices of which frames I can select or turn off to get the best results.

2 image panorama @ 14mm, combined in Photoshop

3 Horizontal Images Stacked Vertically @14mm ea.
2 Horizontal Images @ 14mm

2 Horizontal Images @ 14mm

2 Horizontal Images @ 14mm
Black Skimmer Panoramas
Posted on July 30, 2019

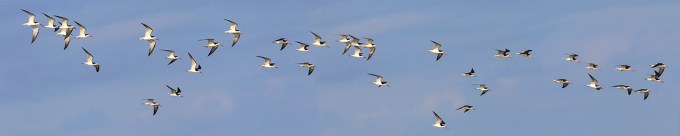
It is a challenge to photograph flying birds for a panorama. After some practice the success rate goes up (hopefully). Basically you shoot a burst of images as you try to cover the area of birds flying you want. Also panning as you shoot, going in the direction they are flying. I found that shooting with a wide angle lens for a large group of birds flying does not give you as much detail as shooting them with a telephoto lens for a panorama. A pretty high shutter speed is also helpful. You might have a few touch-up areas or overlaps to fix once you assemble the base Panorama.
 The panoramas below are a group of Black Skimmers on or close to the shoreline. This is a little easier because most of them are not moving, but again you might need a few touch-ups here or there.

Black Skimmers, 4 images, 400mm f/4 DO lens

Black Skimmer Panorama, 7 images @ 400mm & 1.4X Teleconverter
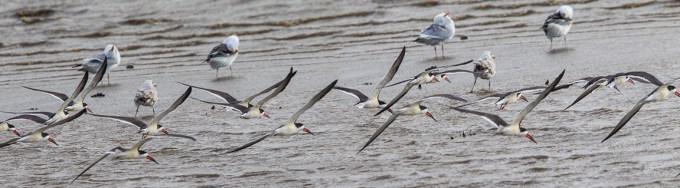
Black Skimmer Panorama, Early Morning, Bad Light, 2 images @ 400mm w/ 1.4X Teleconverter
Brigantine Cloud Panoramas
Posted on July 26, 2019
I finally had a chance to work on some panoramas I shot last month at the Edwin B. Forsythe National Wildlife Refuge, Brigantine Division in Oceanville NJ. The cloud formations on this day were amazing. So I had a lot of choices for working with series panoramas while we were there. Lately I have been using an Olympus m43 Camera with a 14mm – 140mm zoom for landscapes or general info shots and the Canon R with a 400mm DO lens or the Tamron 150-600mm for Wildlife. It is a lot easier to carry a smaller m43 camera with a wide zoom range along with the heavier full frame camera with longer lenses, instead of 2 large camera bodies. The m43 format with a 14-140mm zoom seems a little harder to do multi-image panoramas @14mm but after working with it for quite a while I am getting more usable & predictable panoramas. Sort of a learning curve I guess. Basically I overlap the images more. At 14mm with m43 format it is sort of the equivalent (field of view) of 28mm on a full frame DSLR. All the images here are shot at 14mm but go from 2 to 8 images for each photo panorama. Some were vertical images and some were horizontal images for each image.

2 – 14mm Horizontal images panorama

Panorama- 4 Vertical Images @14mm

Panorama – 3 vertical images stacked @ 14mm

3 horizontal images stacked @14mm

Panorama – 4 horizontal images @14mm

2 horizontal images stacked @ 14mm

2 Horizontal images @14mm Stacked

2 Horizontal images – Atlantic City on left @14mm

2 Horizontal Images Stacked @ 14mm

2 Horizontal Images Stacked – Osprey Platform @ 14mm

2 Horizontal images Stacked @14mm
2 -Horizontal Images @14mm

3 – Horizontal Images Stacked @14mm

2 – 14mm Horizontal Images Stacked

7 – 14mm Images stacked

Two Trees – 3 Images Vertical Stacked

Brigantine Landscape- 3 Horizontal Images Stacked @14mm

Brigantine Landscape w/ Clouds – 2 Horizontal Images @14mm

Brigantine 3 Vertical Images @14mm

Brigantine – 2 Horizontal Images @ 14mm

Brigantine NWR 2 Image panorama

Brigantine NWR – 3 Image panorama @14mm

7 image panorama – 7 – 12mm vertical images combined in Photoshop

2 Vertical Images @14mm
Panoramas Are Not Just For Landscapes
Posted on July 8, 2019

Many times when I am out looking for bird photo subjects, I am usually using a 400mm lens with a 1.4x teleconverter. Sometimes I will also carry an Olympus m43 Camera with a 14-140mm lens for landscapes or views that I like that need a wider view, giving me a FOV equivalent to a full frame SLR of 28mm to 280mm. But if I am walking around a big area, I just carry the Canon body with the 400mm & 1.4x teleconverter. So when I come across a cooperative close bird or other interesting subject, I then shoot a series of images as quickly as I can, handheld. Using a tripod slows down the quick shooting process and I let Photoshop align them. Usually I try for at least 4 or 5, but have had some success with 2 or 3. Depends how cooperative my subject is. This immature Little Blue Heron was an example of one overly cooperative subject. I was at Ding Darling NWR and I was photographing birds that were out on a sand dune and this one kept coming up to me. There had been a few fishermen there before me and were feeding him fish. So I guess he thought I would do the same. After a while he just caught a lizard and wandered off. Then he kept wandering around the area behind me on the other side of the Wildlife Drive. He was looking for a meal so I shot a few quick series of different images for some panorama series. Some vertical, some horizontal. The trick to this is a series of images as quick as possible because the subjects usually are moving. Handheld images are then aligned in Photoshop and then retouched to add either a missing area of background or just fine tuning here and there. The featured image is a 2 image pano of the walking Egret. Below is a series of panorama images shot at 560mm, then assembled in Photoshop. Then blank areas outside the assembled image were filled in by Photoshop. Once you get used to using this technique, they seem to come out more consistently. This also gives you large files if you really want to print them large.

3 vertical images for panorama. Photoshop filled in blank areas.

2 image vertical panorama

2 image short stack panorama

White Ibis – 2 horizontal Images for panorama
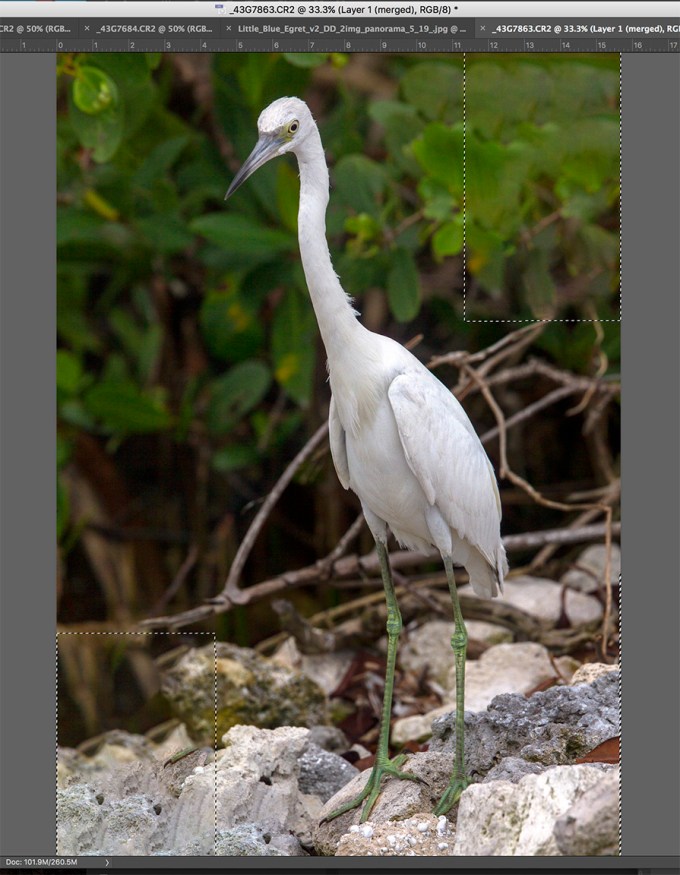
3 images assembled in Photoshop and blank areas (dotted line outlines) automatically filled in by Photoshop content aware fill.
Selecting images for the panorama in Adobe Bridge to import and assemble in Photoshop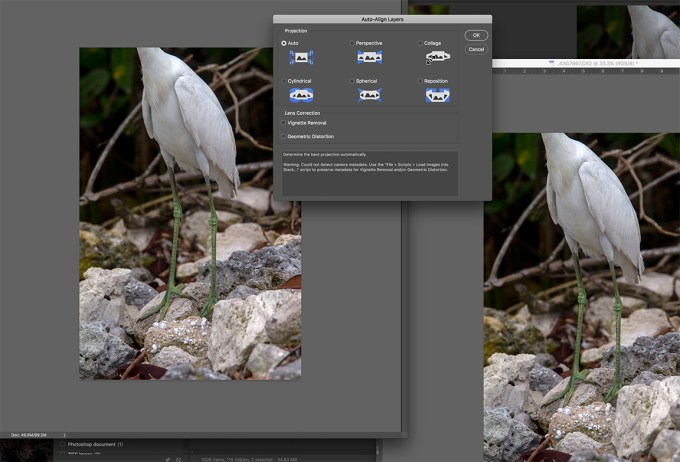
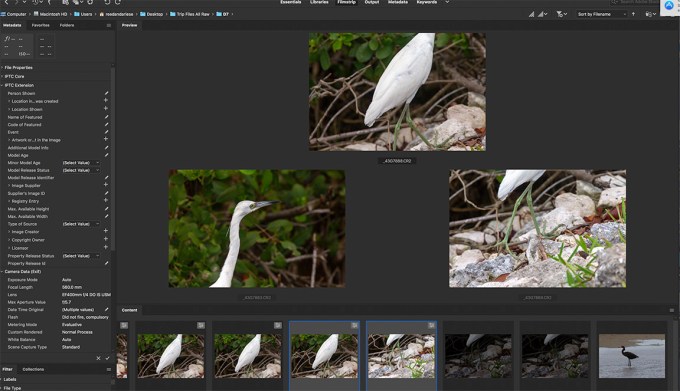
Images for panorama selected in Adobe Bridge
One of my largest, small area panoramas. 64 image panorama – shot with 300mm f/4 lens. Largest amount of layers for the size of the area shot. Multiple rows of multiple images. I over overlapped to make sure I got the most detail and also make sure it would all align for the final image. Not sure how long it took for Photoshop to align everything. After 3-4 hours I went to bed and it was done when I woke up. Then I did a few touch ups here and there.
Snow Geese Panoramas from Brigantine
Posted on March 7, 2019

Sometimes when I find a large groups of birds I try a few panoramas, just for fun. On this day I found a very large group of Snow Geese, mostly sleeping, so I thought I would give it a try. There was not much else around, so why not. They were not moving and stretched a long ways along the Wildlife Drive. The featured image (which will probably not show much detail in this blog) was 35 images, handheld, for a finished panorama of 550 inches long by 15.5 inches high. It took Photoshop quite a while for it to process the panorama and then I had a few touch-ups here and there because of the length. I was trying a new Canon R with a 400mm f/4 D.O. lens and 1.4X teleconverter. It was not very bright out so I should have raised my ISO and stopped down more for increased depth of field, but I thought it might be enough when I photographing them. So the foreground is a little soft, but it was still fun to try.

Cropped section to show more detail

Another Closer Cropped section

Image taken later when they started to move around. Single Image showing limited depth of field on foreground because I was focusing on the flying birds landing in background.

Starting to wake up and move around
4 Image Panorama – Flying Brant Ducks with Atlantic City Skyline
Posted on February 28, 2019
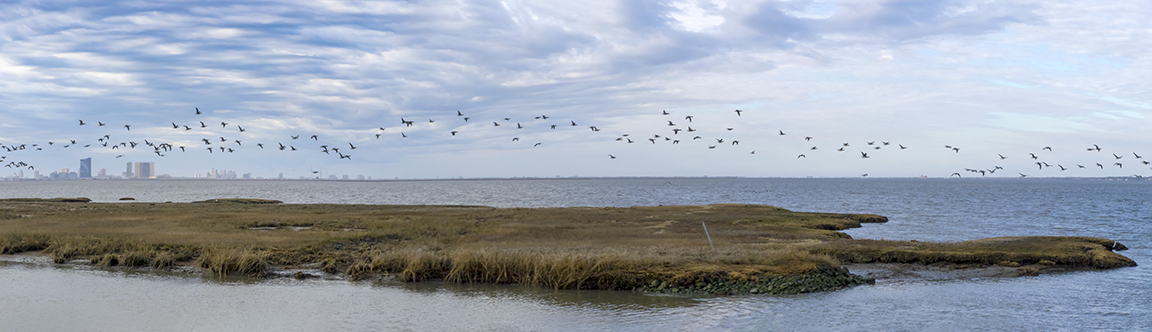
As I was photographing these Brant Ducks, I also shot a series of the flying birds for a panorama, to see how it might work out. I was surprised it pretty much just worked out fine with no retouching of overlapping Brants. I was using a m43 camera with a Panasonic 14-140mm lens @48mm. I started on the left and just shot a quick series going to the right. I always shoot the pano of flying birds in the direction they are going. Seems to work better that way. The files adjusted in Adobe Camera Raw and the panorama assembled & blended in Photoshop for the final image.
Brigantine Early Morning Landscape
Posted on February 19, 2019
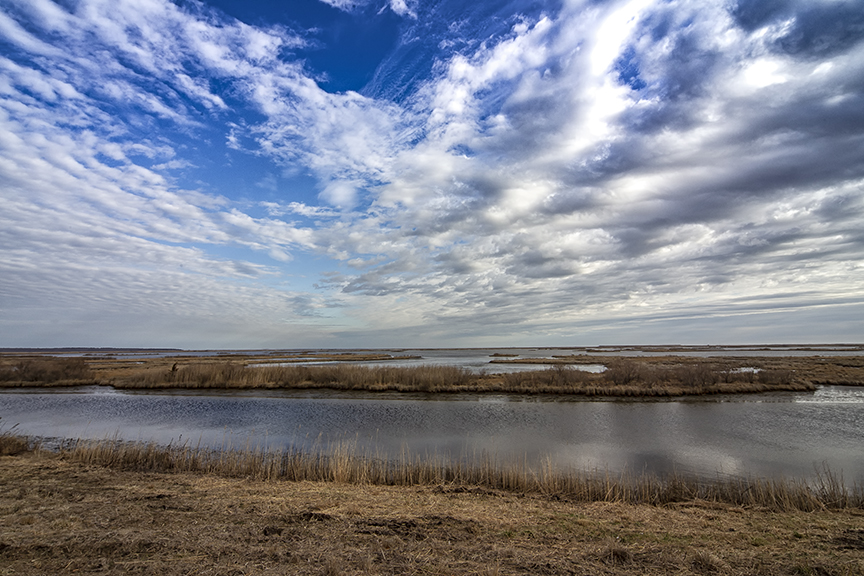
We went to the Edwin B. Forsythe National Wildlife Refuge, Brigantine Division to see what we could find to photograph. In the early morning the clouds were amazing and made for interesting photo opportunities. It started out with darker looking somber clouds then brightened up as the morning went on. The featured image was shot @ 12mm on a Canon Camera. The series of clouds over the Wildlife Drive below were shot with a m43 format camera @14mm. When doing panoramas with wide angle lenses on a m43 format camera you need to overlap your images for the panorama a lot more. It is better to have more to choose from than not have enough. It seems if you have too few frames you tend to get some strange distortions (at least using Photoshop to assemble) in the blending of the images.
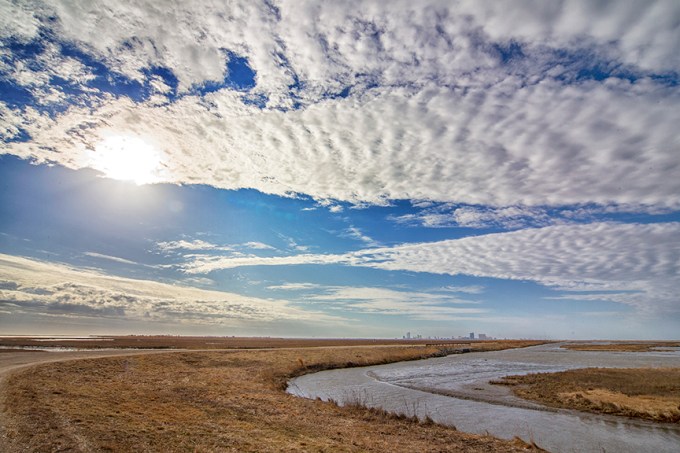
12mm Clouds & Sun image along Wildlife Drive with Atlantic City on the horizon in the distance.

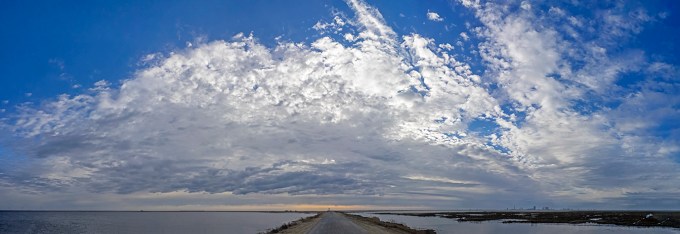
9 image (Horizontal) panorama, 14mm, (28mm Full Frame FOV) m43 Olympus

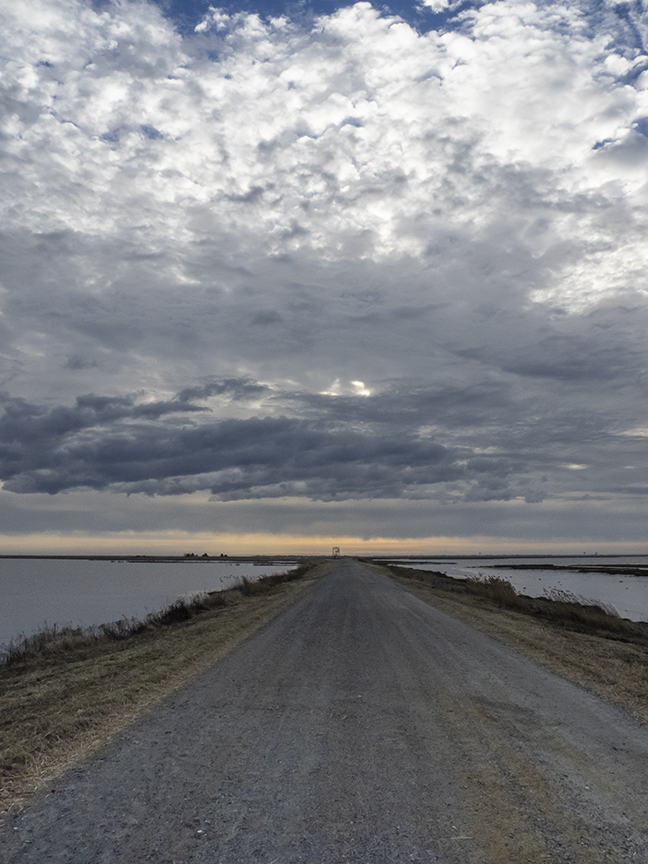
6 vertical image panorama, @14mm m43 Olympus

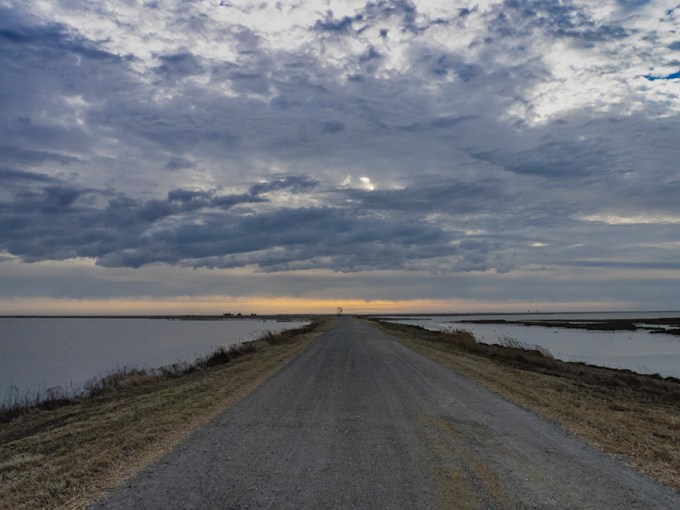
2 image panorama, 14mm m43 Olympus
7 vertical image horizontal panorama, 14mm, m43 Olympus
Multi-image panorama with dark clouds earlier in the am, 14mm, m43 Olympus
Clouds over Wildlife Drive, Single image, 14mm m43 Olympus
