 photoartflight
Great Blue Heron In The Grasses
Posted on September 4, 2021

As we were driving along the Brigantine Wildlife Drive looking for photo subjects we came upon this Great Blue Heron standing in the Grasses. It was quite far out so I put a 2X Teleconverter on my 150-600mm lens to get a closer image. It came out fairly well considering the Tamron 150-600mm lens @ 600mm with a 2X teleconverter (1200mm) is somewhat pushing the sharpness of the lens & image. Stopping down more to f/16 helped quite a bit plus using more Sharpening in Camera Raw when adjusting my images also helped. Usually when using a Teleconverter, I stop down more than I usually do when not using a Teleconverter. For example – when using a 1.4X teleconverter I stop down 1 more f/stop than usual. When using a 1.7X or 2X Teleconverter I stop down 2 stops more than usual. I flattened my layers & duplicated the final layer to have a duplicate layer above my final layer. Using Filter > Other>High Pass Sharpening I had a Grayscale duplicate image above my final color layer. The Grayscale layer was then changed from Normal to Overlay in the layers palette and I lowered the opacity of the High Pass layer to about 40 percent opacity. This just adds a little more Crispness or Sharpness (on the image edges) since I was using a 2X Teleconverter on the Tamron 150-600mm Lens. When using a Grayscale High Pass layer technique it is best to not go too “heavy” on the opacity of High Pass layer. Usually I only go to 20% or 30% opacity on the High Pass layer, but really depends on the image you are working on. This technique can also help sharpness when printing images on an Ink Jet Printer which is basically spraying the ink. But for Inkjet printing I would lower the High Pass layer even a little more. It takes some practice but helps. In my old commercial photo studio before I retired we also did a lot of Wide Format printing for our Corporate & Advertising Agency clients. I had 2- 60″ wide HP Printers for indoor display & fine art graphics & 44″ & 63″ Epson Printers for outdoor graphics or indoor specialty medias. Give this technique a try, but do not overdo the opacity of the High Pass layer. Again it takes some practice, but comes in handy.
Yellow-Crowned Night-Heron Hanging Out In The Shade
Posted on February 6, 2018
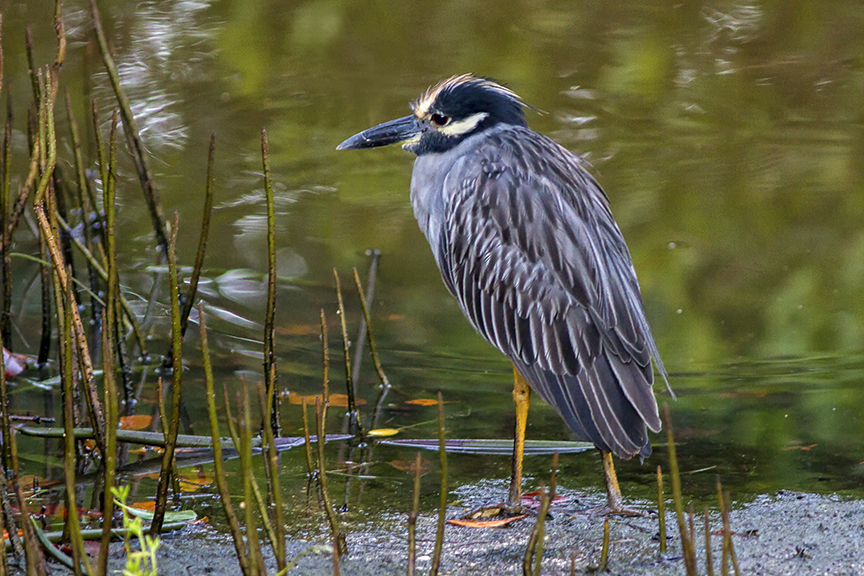
I was walking down one of the paths early in the morning at the J.N. Ding Darling NWR. It was pretty dark on the sides of the path under the trees and mangroves. I heard Ibises moving in the lower branches of trees and in the mangroves but were mostly hidden by branches. Plus it was extremely dark to get a photo. Then I noticed this Yellow-crowned Night-Heron out in the open, standing under the branches. It was still very dark because the branches were blocking the rising sunlight. The Heron did not seem to be bothered and did not move, so I took a few shots and moved on. It was so dark where the Heron was, my shutter speed was very very slow, so I shot a series of bursts and purposely underexposed to get my shutter speed up. I did not want to raise my ISO, because the Canon camera I was using gets more “noise” at higher ISO’s. It was easier to work on sharpness later. I was using a 300mm f/4 lens with a 1.4x teleconverter giving me f/5.6 wide open. I have more success with having less noise from not using a high ISO, and under exposing a little and then brightening my image in Photoshop. Then adding a “high” pass sharpening technique in Photoshop and blending it in.
