 photoartflight
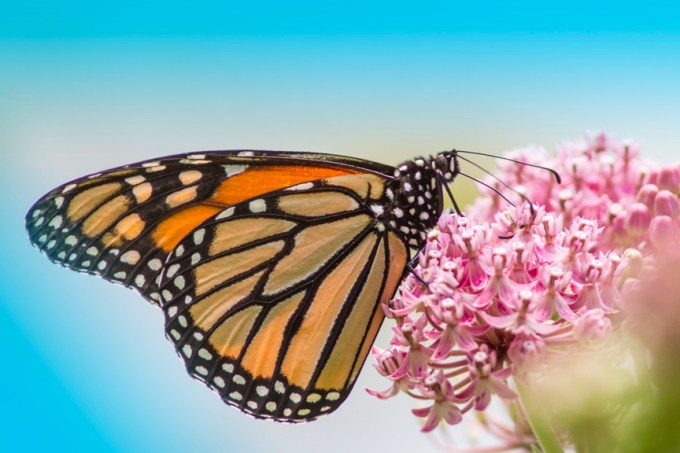
Monarch Butterfly Portraits
Posted on August 30, 2018

It is interesting to see and photograph Monarchs feeding on a plant. But after photographing them for years I never realized their amazing full life cycle. You know they go through the different stages, caterpillars thru to butterflies, but I did not realize how many stages they have.
The following info is from www.learnaboutnature.com
The Photos are PhotoArtFlight Images.
Monarch butterflies go through four stages during one life cycle, and through four generations in one year. It’s a little confusing but keep reading and you will understand. The four stages of the monarch butterfly life cyclebutterfly are the egg, the larvae (caterpillar), the pupa (chrysalis), and the adult butterfly. The four generations are actually four different butterflies going through these four stages during one year until it is time to start over again with stage one and generation one.
In February and March, the final generation of hibernating monarch butterflies comes out of hibernation to find a mate. They then migrate north and east in order to find a place to lay their eggs. This starts stage one and generation one of the new year for the monarch butterfly.
In March and April the eggs are laid on milkweed plants. They hatch into baby caterpillars, also called the larvae. It takes about four days for the eggs to hatch. Then the baby caterpillar doesn’t do much more than eat the milkweed in order to grow. After about two weeks, the caterpillar will be fully-grown and find a place to attach itself so that it can start the process of metamorphosis. It will attach itself to a stem or a leaf using silk and transform into a chrysalis. Although, from the outside, the 10 days of the chrysalis phase seems to be a time when nothing is happening, it is really a time of rapid change. Within the chrysalis the old body parts of the caterpillar are undergoing a remarkable transformation, called metamorphosis, to become the beautiful parts that make up the butterfly that will emerge. The monarch butterfly will emerge from the pupa and fly away, feeding on flowers and just enjoying the short life it has left, which is only about two to six weeks. This first generation monarch butterfly will then die after laying eggs for generation number two.
The second generation of monarch butterflies is born in May and June, and then the third generation will be born in July and August. These monarch butterflies will go through exactly the same four stage life cycle as the first generation did, dying two to six weeks after it becomes a beautiful monarch butterfly.
The fourth generation of monarch butterflies is a little bit different than the first three generations. The fourth generation is born in September and October and goes through exactly the same process as the first, second and third generations except for one part. The fourth generation of monarch butterflies does not die after two to six weeks. Instead, this generation of monarchs migrates to warmer climates like Mexico and California and will live for six to eight months until it is time to start the whole process over again.
It is amazing how the four generations of monarch butterflies works out so that the monarch population can continue to live on throughout the years, but not become overpopulated. Mother Nature sure has some cool ways of doing things, doesn’t she?


First Bluebird Of The Season
Posted on May 5, 2018
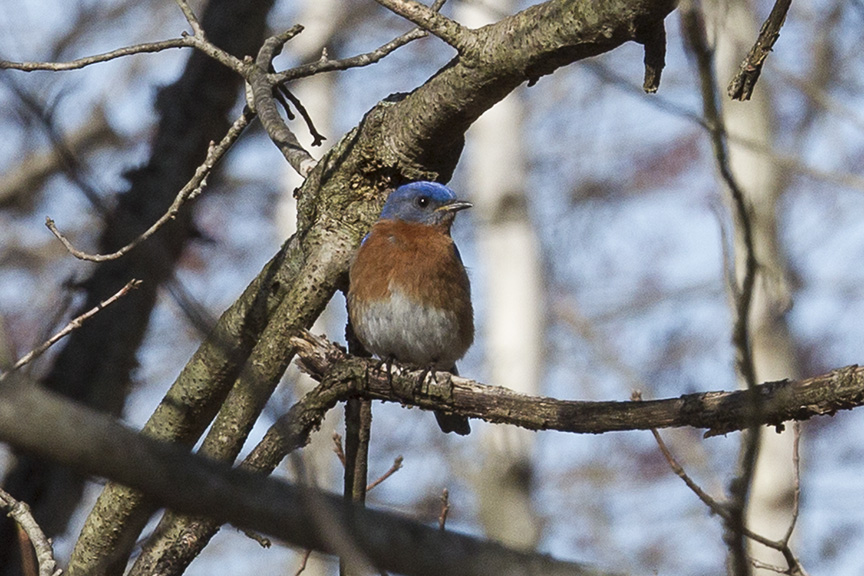
We had gone to the Plainsboro Preserve in Cranbury, NJ to see what we could find to photograph and to take a walk. I was using a 150mm macro lens with a 1.4x teleconverter thinking I would look for macro subjects. Plainsboro Preserve is 1,000 acres with 5 miles of trails. Also has McCormack Lake which is 50 acres. So it is a nice location to walk through and see what you can find. We saw lots of Beaver activity, trees chewed at the base & downed trees along the path. We were surprised to see Bluebirds along the paths, but they were high in the trees. I tried quite a few shots but with the lens I had, limited me to what I could get. Plus they did not stay on a branch long and kept moving between the branches. I finally got a few somewhat clear shots, but the Bluebird was not very large in the frame. I have made my own actions in Photoshop for uprezzing files for large prints, but it also works well for extreme cropping of images.
Daisy With Water Drops
Posted on March 21, 2018

We are getting another snow storm here in the Northeast so I am going through images that I have not worked on from warmer days. Here are a few Daisies after a rain storm with water droplets. At least it makes me feel warmer weather is on its way. Featured image is a two shot panorama.

Closer view with water drops on petals. 150mm macro

Centered detail with water drop.
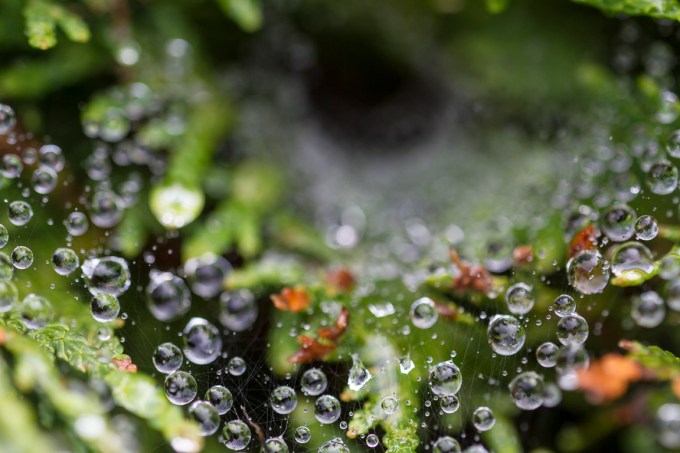
Raindrops On Bush – 10 Image Focus Stack
Posted on March 16, 2018

While looking for a photo subject in the yard, I saw these tiny raindrops on a evergreen shrub. It looked like an interesting pattern of raindrops going back into the shrub. I liked the circular dark hole in the background as a distant destination point. Almost like a “black hole” in the distance. I shot a series of 10 images at f/8 in different focus points along a range from near to far for the range I wanted to shoot. Then I opened all the images in Layers in one Photoshop file. Selecting all the layers, I used Auto Align to line up all the drops in the layers. After aligning, I used Auto Blend to combine all the “in focus” sections into one flattened image.
The First Near Focus Image in the Stack.

The Tenth Final Image in the Stack
Closeup Eagle Portrait
Posted on February 11, 2018

I finally found a bird I cannot scare away. Usually I am cautious to not get too close. Also I do not want to scare them off. I found this one that did not care how close I got! Plus it did not fly off! It just seemed to ignore my presence as if I was not there. I am not sure of the specific species, but I think it was in the Granite Eagle family. I have seen many at a distance, but this is the first one I found that I could get close to. Others I have seen were on top of government buildings. So I moved on, not to disturb it anymore than I did.
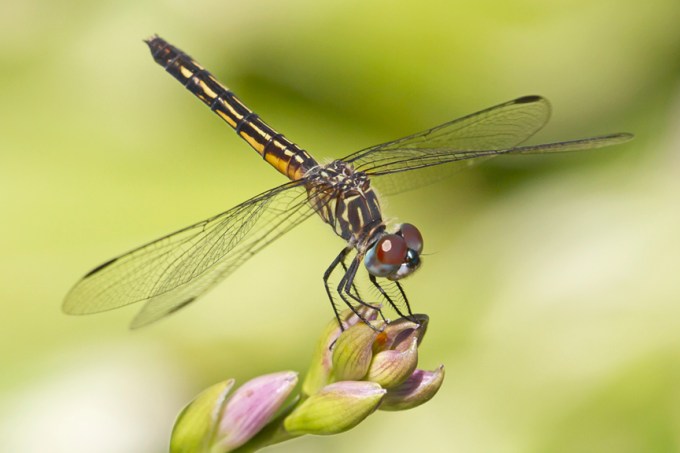
Blue Dasher Female Portrait
Posted on July 17, 2017

I found this female Blue Dasher in the yard. It was bouncing back and forth on the flowers. I stood watching for a few minutes and then it seemed to not fly off when I got closer. I guess it got used to me being there. I was using a 150mm macro lens with a 1.4x teleconverter so it allowed me to get pretty close. It is interesting that the female dragonflies are usually a different color scheme than the males. Sometimes makes it harder to ID.


Dandelion Short Stack
Posted on July 1, 2017
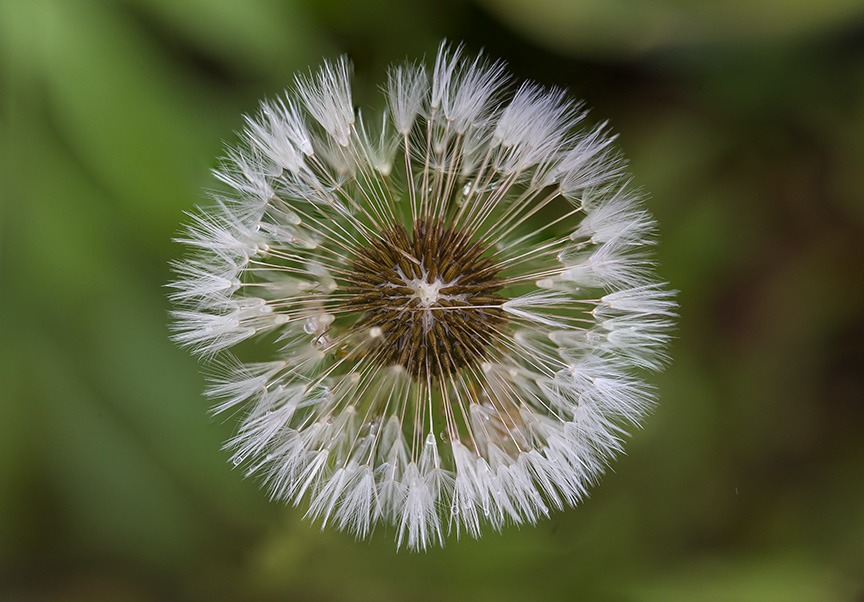
I was looking for some photo subjects in the yard after a light rain and found this weathered dandelion with a few tiny raindrops on it. It was open on top so I could see more into the center. I shot a short series of focused images for what I wanted in focus, wide open at f/2.8 with a 150mm macro lens. Four images, aligned, stacked and combined in Photoshop. I used f/2.8 instead of stopping down more to get a clean looking background and used image stacking to get what I wanted in a limited focus range, while keeping the smooth looking background I wanted.
4-images stacked in CC 2017 Photoshop, 150mm macro
Day Lily After A Rain
Posted on June 25, 2017

I Went looking for photo subjects in the yard after a rain storm. I found this Day Lily which had quite a few water drops over the flower. I was shooting @ f/2.8 for a softer background, since there were other plants & leaves close behind the flower. So I shot 6 images adjusting focus on the areas I wanted more in focus to maintain a softer background. Combined in Photoshop for the effect I was looking for.
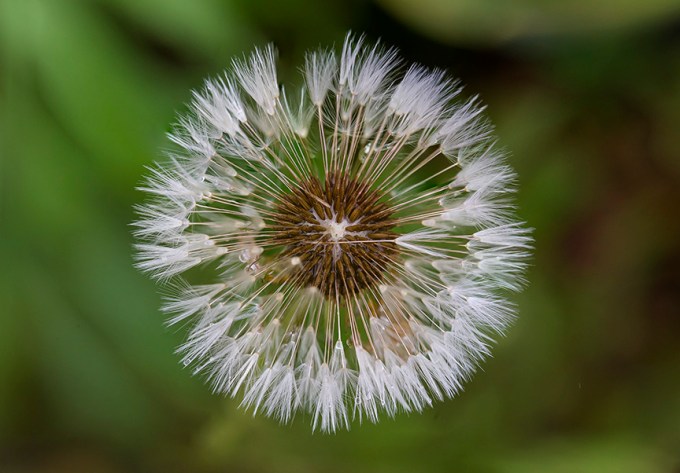
Dandelion Short Image Stack
Posted on June 24, 2017

After a rain, I was looking for macro subjects in the yard. I found this Dandelion with a couple of little water drops on it. It was not a full “ball” on top so you could see inside to the center more easily.
I tried a 2 shot stack @ f2.8 for the featured image and a 4 shot stack for the image below. Both were shot handheld with a Sigma 150mm macro.
4-images stacked in CC 2017 Photoshop, 150mm macro @ f/8
Day Lily Stamen Image Stack
Posted on June 22, 2017

The Day Lily’s were blooming in our garden, so I wanted to do some closeup image stacks for practice. Usually I use a 50mm or 100mm macro lens, but I wanted a little more distance to concentrate on the stamens. It was a cloudy day so it was as if I was using a giant soft box so there were no harsh shadows to deal with. I used a 150mm macro to help concentrate on the stamens and still give me the working distance I wanted. This was a 6 image stack, focused pretty much just on the stamens. I did not want the whole flower in sharp focus, so I concentrated my focus stack only anthers on the end of the stamens. Again combined and assembled in Photoshop. Each Lily has 6 stamens attached at the base of the petals, and each stamen has a stalk called the filament that ends with a two-lobbed anther filled with yellow dust like yellow pollen.
